 |
 |
 |
 |
 |
 |
 |
 |
 |
 |
 |
-while-en-route-to-the-raid's-takeoff-point-01.jpg) |
-while-en-route-to-the-raid's-takeoff-point-NH53291.jpg) |
-while-en-route-to-the-raid's-takeoff-point-NH53295.jpg) |
-while-en-route-to-the-raid's-takeoff-point-NH53425.jpg) |
 |
 |
 |
 |
 |
 |
 |
 |
 |
 |
 |
 |
 |
 |
 |
 |
 |
 |
 |
 |
 |
 |
 |
 |
 |
 |
 |
 |
 |
 |
 |
 |
 |
 |
 |
 |
 |
 |
 |
 |
 |
 |
 |
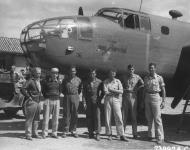
-with-members-of-his-flight-crew-and-Chinese-officials-China-April-1942-NH97502.jpg) |
 |
 |
-to-deliver-parts-for-the-mission's-B-25B-aircraft-NH53288.jpg) |
-to-deliver-parts-for-the-mission's-B-25B-aircraft-NH53294.jpg) |
 |
 |
 |
 |
-April-1942-NH53423.jpg) |
-April-1942-NH53424.jpg) |
-while-on-its-way-to-attack-targets-in-Japan-18th-April-1942-NH53419.jpg) |
-April-1942-01.jpg) |
-April-1942-02.jpg) |
-April-1942-NH53422.jpg) |
-Aprile-1942-01.jpg) |
-Aprile-1942-02.jpg) |
-Aprile-1942-03.jpg) |
-Aprile-1942-NH53426.jpg) |
 |
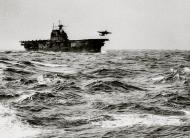
-escorting-USS-Enterprise-(CV-6)-the-Doolittle-Raid-launch-day-18th-April-1942-80-G324218.jpg) |
-maneuvers-near-USS-Enterprise-(CV-6)-on-the-day-the-Doolittle-Raid-80-G-324232.jpg) |
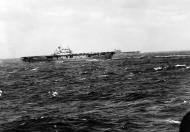
-approaches-USS-Hornet-(CV-8)-from-astern,-with-USS-Nashville-(CL-43)-beyond-NH53292.jpg) |
-escorting-USS-Enterprise-CV-6-the-Doolittle-Raid-launch-day-18th-April-1942-01.jpg) |
-while-en-route-protected-by-USS-Gwin-(DD-433)-alongside-and-USS-Nashville-(CL-43)-NH53289.jpg) |
-firing-her-6-inch-main-battery-at-a-Japanese-picket-boat-encountered-by-the-task-force-18th-April-1942-NH97500.jpg) |
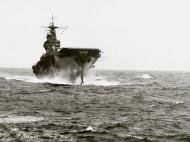
-refuels-USS-Enterprise-(CV-6)-in-rough-weather-during-the-approach-phase-17th-April-1942-80-G-330659.jpg) |

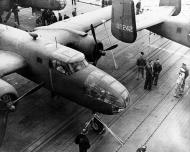
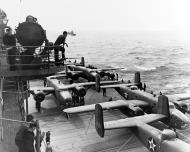
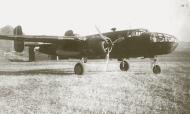
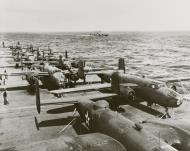
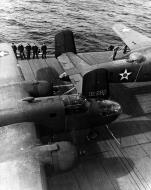
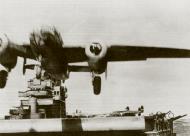
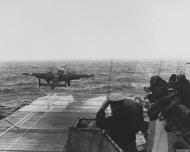
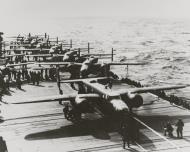
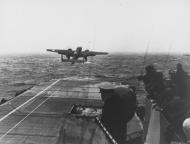
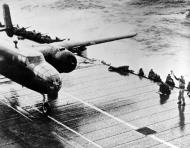
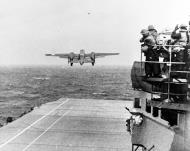
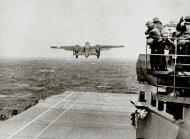
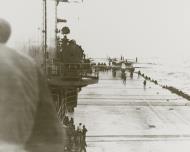
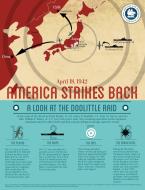
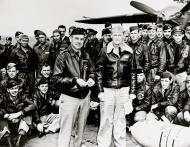
Doolittle Raid B-25Bs aboard USS Hornet
The Doolittle Raid on Tokyo
Forced to launch early, the crews of the 16 B-25's prepared their planes. Each of the crews had their own targets. The first group would be attacking Tokyo. They were still farther away from the Japanese homeland than originally anticipated. Fuel calculations weighed heavily on every crew. Based on the most widely reported distances, they were on the edge of their calculated fuel window. As the bombers reached their intended destination, they were surprised at the minimal resistance encountered. Some crews were able to drop their bombs on their intended targets. Others were forced to identify secondary targets for a number of reasons. On their flight from Japan to China, the crews got an unexpected break in the form of a tail wind. Although this would not make up for the lack of fuel, it did act to lift the spirits of the crews on board the bombers. Below is a crew by crew summary of their flight from the Hornet to their destinations. For some crewmen, we have included some information on what they did after the raid. We intend to expand on this information in the near future. Most of the Raiders survived the raid, and most of those that did, returned to fight. Some were lost in later missions. Many of the Raiders continued to fly B-25s after the raid.
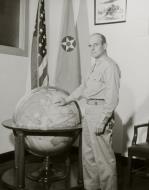
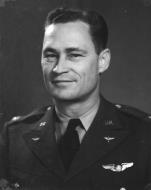
Brigadier General James H Doolittle points to Tokyo on a World globe, sometime after his return to the United States USAF
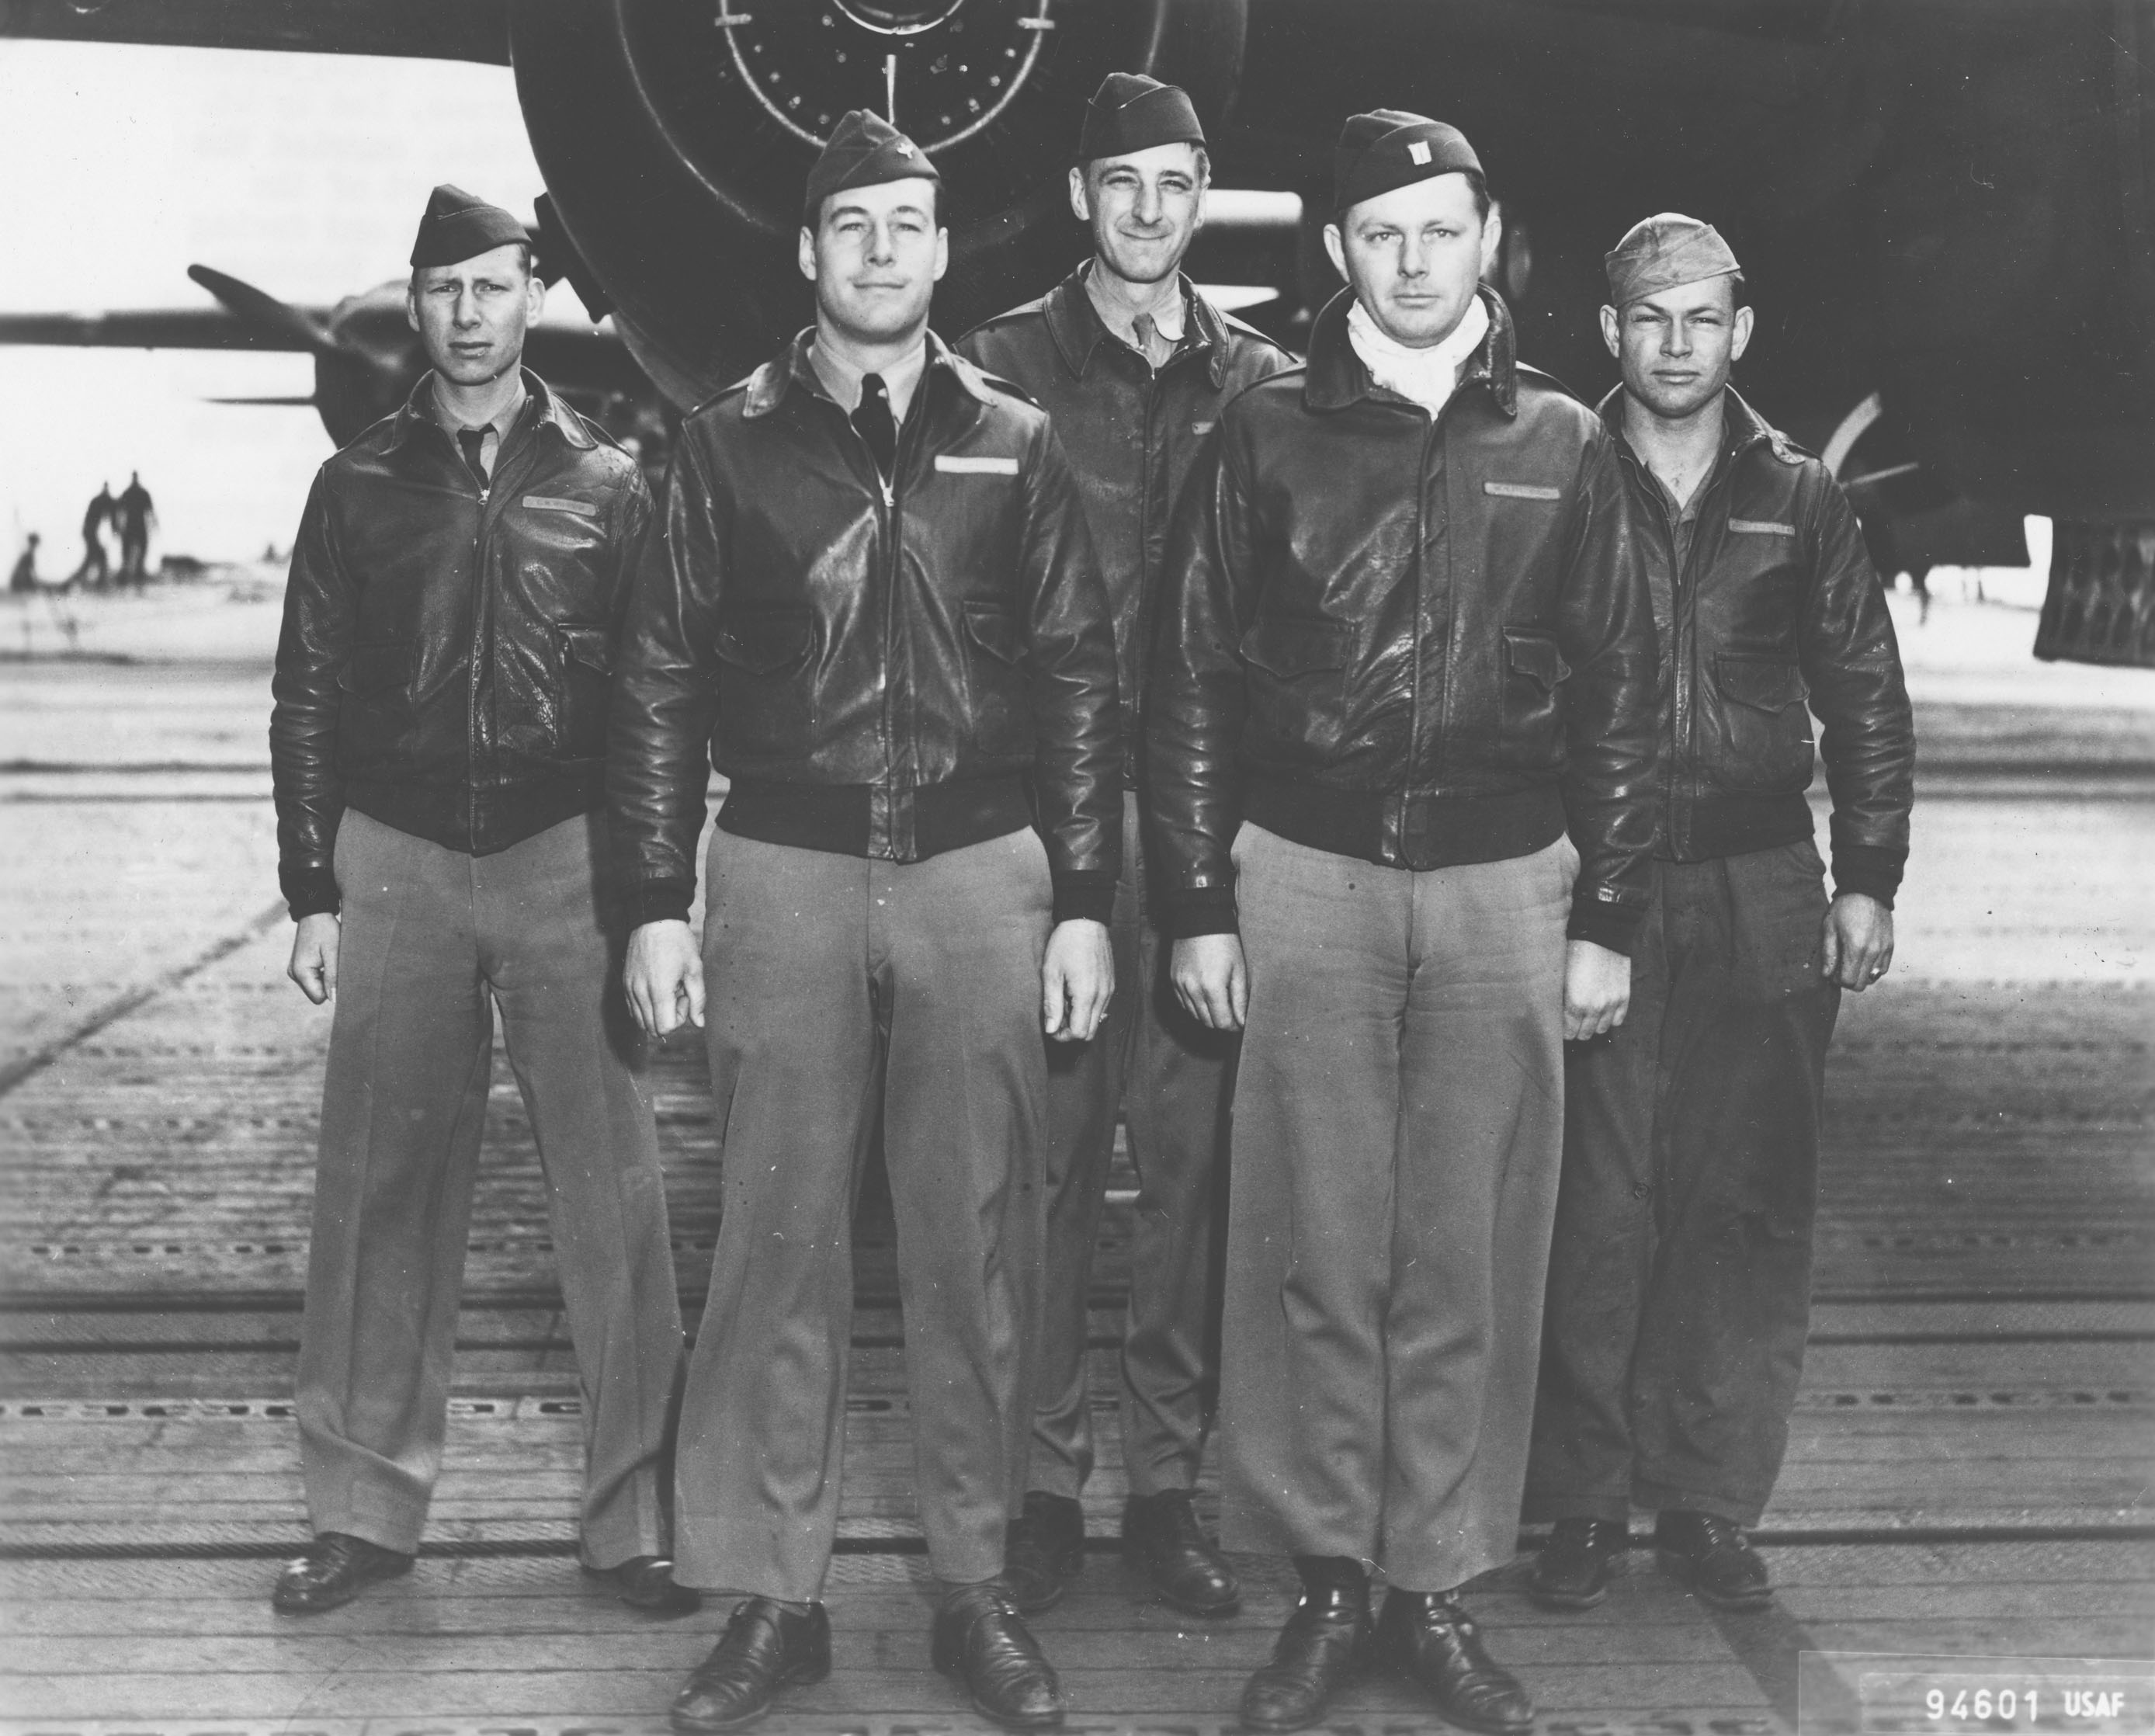
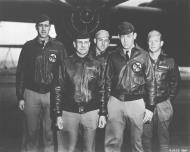
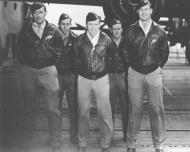
Crew No 01 40-2344 B-25B Mitchell 17BG34BS Doolittle Tokyo raiders 01
Crew #1 SN 40-2344
Pilot: Lt. Col. J. H. Doolittle Co-Pilot: Lt. R. E. Cole Navigator: Lt. H. A. Potter Bombardier: SSgt. F. A. Braemer Engineer/Gunner: SSgt. P. J. Leonard Crew #1 was the first to launch from the Hornet. Lieutenant Dick Cole, copilot, was confidant their B-25 would successfully become airborne. He had placed all of his faith in the abilities of his pilot. Lieutenant Col. Doolittle did not let him down as he took to the air. Keeping as low as the terrain would allow, Doolittle guided his plane toward his target. Japanese air maneuvers were common. Never having seen a B-25 bomber, most of the Japanese residents thought nothing of the planes flying overhead. The crew was low enough to see Japanese citizens waving at them as they passed, apparently unaware. As he closed in on his target, Doolittle raised the plane to 1,200 feet. The four incendiary bombs were released over a large factory in Tokyo. Low on fuel, he headed west toward the coast of China. Doolittle ordered his crew to bail out over the mountains of China. The bomber crashed in Haotianguan, China. Local Chinese helped the crew to Chuchow.
After the raid: Sergeant Braemer continued to fly B-25s until May of 1943 transferring to the 22nd Bomb Squadron, and then with the 491st Bomb Group. The now Lt. Col. Dick Cole is one of two surviving raiders. He flew approximately 65 missions as a "Hump" pilot in C-47s.
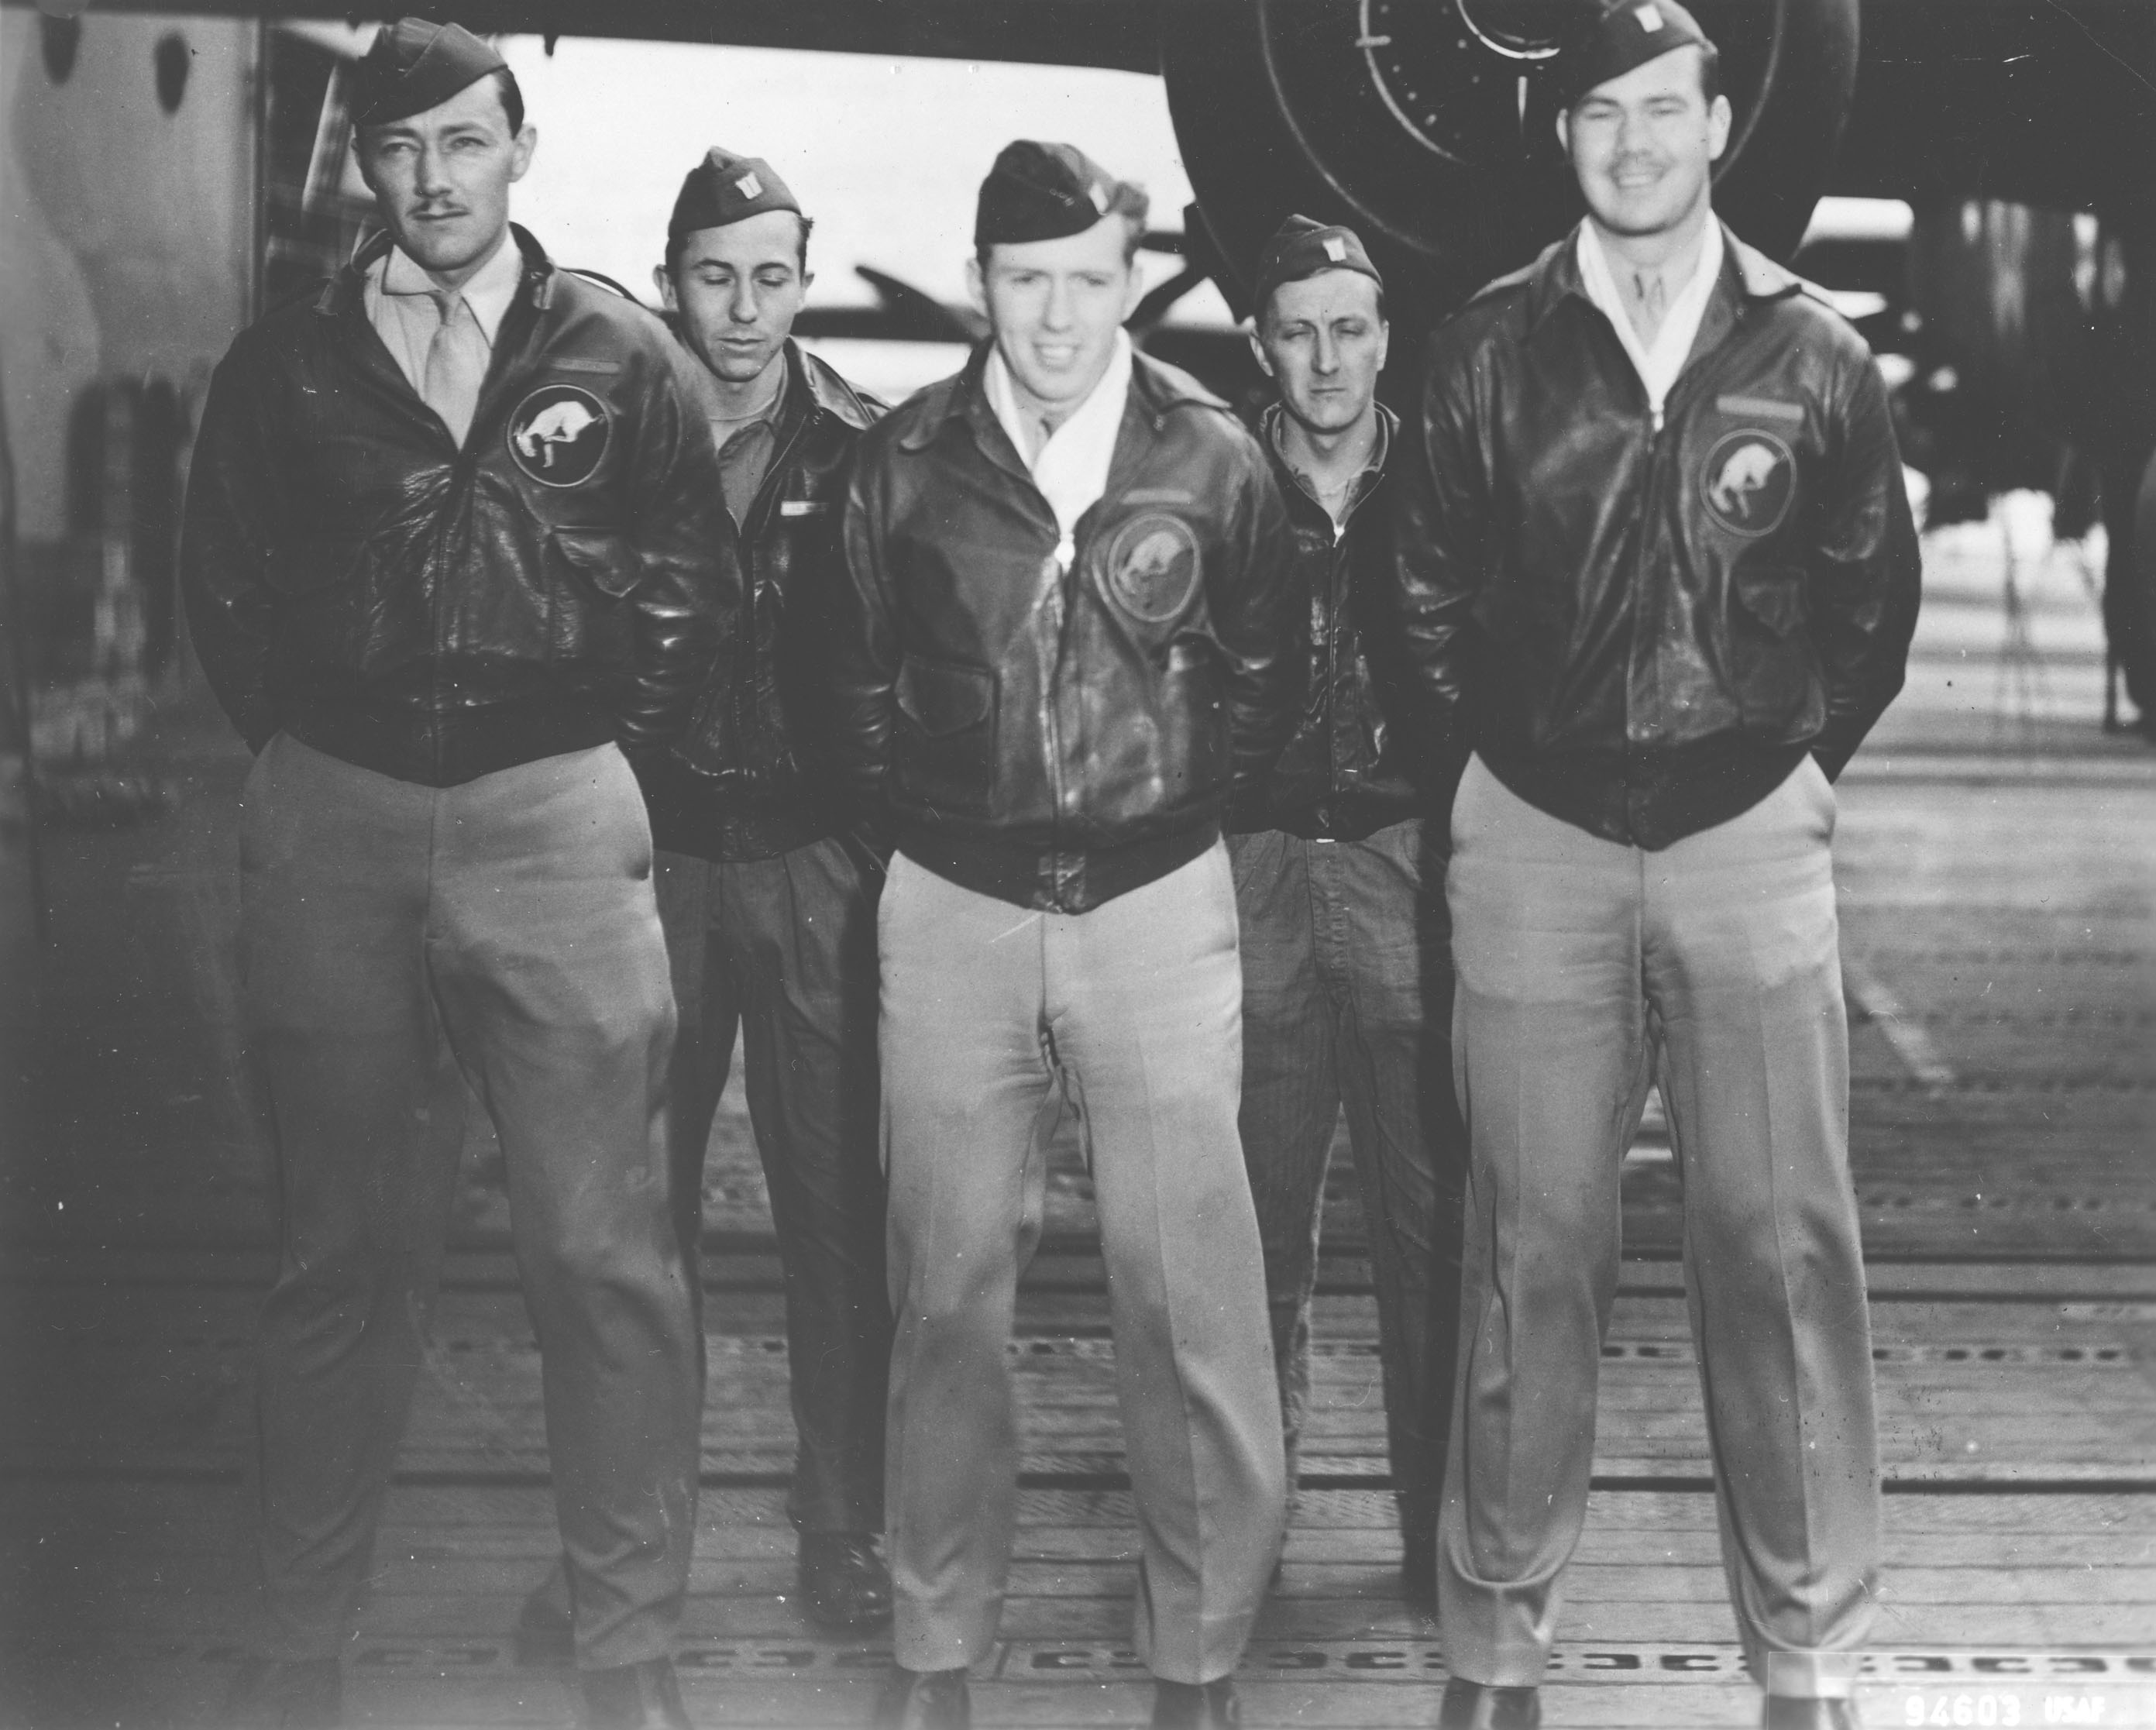
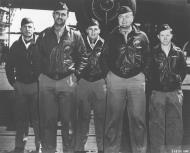
Crew No 02 40-2292 B-25B Mitchell 17BG34BS Doolittle Tokyo raiders 01
Crew #2 SN 40-2292
Pilot: Lt. T. Hoover Co-Pilot: Lt. W. N. Fitzhugh Navigator: Lt. C. R. Wildner Bombardier: Lt. R. E. Miller Engineer/Gunner: SSgt. D. V. Radney As Lt. Travis Hoover launched off the Hornet, he pulled up hard to get in the air. The bow wash pushed the plane even higher. To keep the B-25 from stalling, he and his co-pilot pushed hard against the controls and the plane appeared to dive toward the waves. Utilizing some great flying skills, Hoover was able to regain control of the aircraft and head toward Japan. Having left just 5 minutes after Lt. Col. Doolittle, they closely followed the first B-25 headed toward Tokyo. Lt. Hoover took is B-25 on it's own course after reaching the outskirts of northern Tokyo. Approaching his target, he increased his altitude to 900 feet and bombed two factory buildings and storehouses near the Sumida River, just outside of Tokyo. The explosions below threw debris a hundred feet above the B-25. Again meeting up with Doolittle, he too headed for China. After losing sight of Doolittle and low on fuel, Lt. Hoover was able to execute a wheels-up landing in a rice paddy near Ningbo, China. At the time, Ningbo was a Japanese occupied area. With the crew unhurt, they set fire to the plane after recovering needed survival gear. The crew walked for three days before they were found by friendly locals and were transported by boat to Sungyao. From there, they traveled to Chunking.
After the raid: Lieutenant Fitzhugh and Sergeant Radney continued to fly B-25s in the CBI until May of 1943 with the 11th Bomb Group. Lieutenant Wildner was transferred to the 22nd Bomb Squadron and then then to the 491st Bomb Group flying B-25s. Lieutenant Hoover was transferred to the 319th Bomb Group, 440th Bomb Squadron becoming their commanding officer in June of 1942. He flew B-25s until May of 1944 when he started flying P-38s. Lieutenant Hoover would continue to fly 73 combat missions during the war.
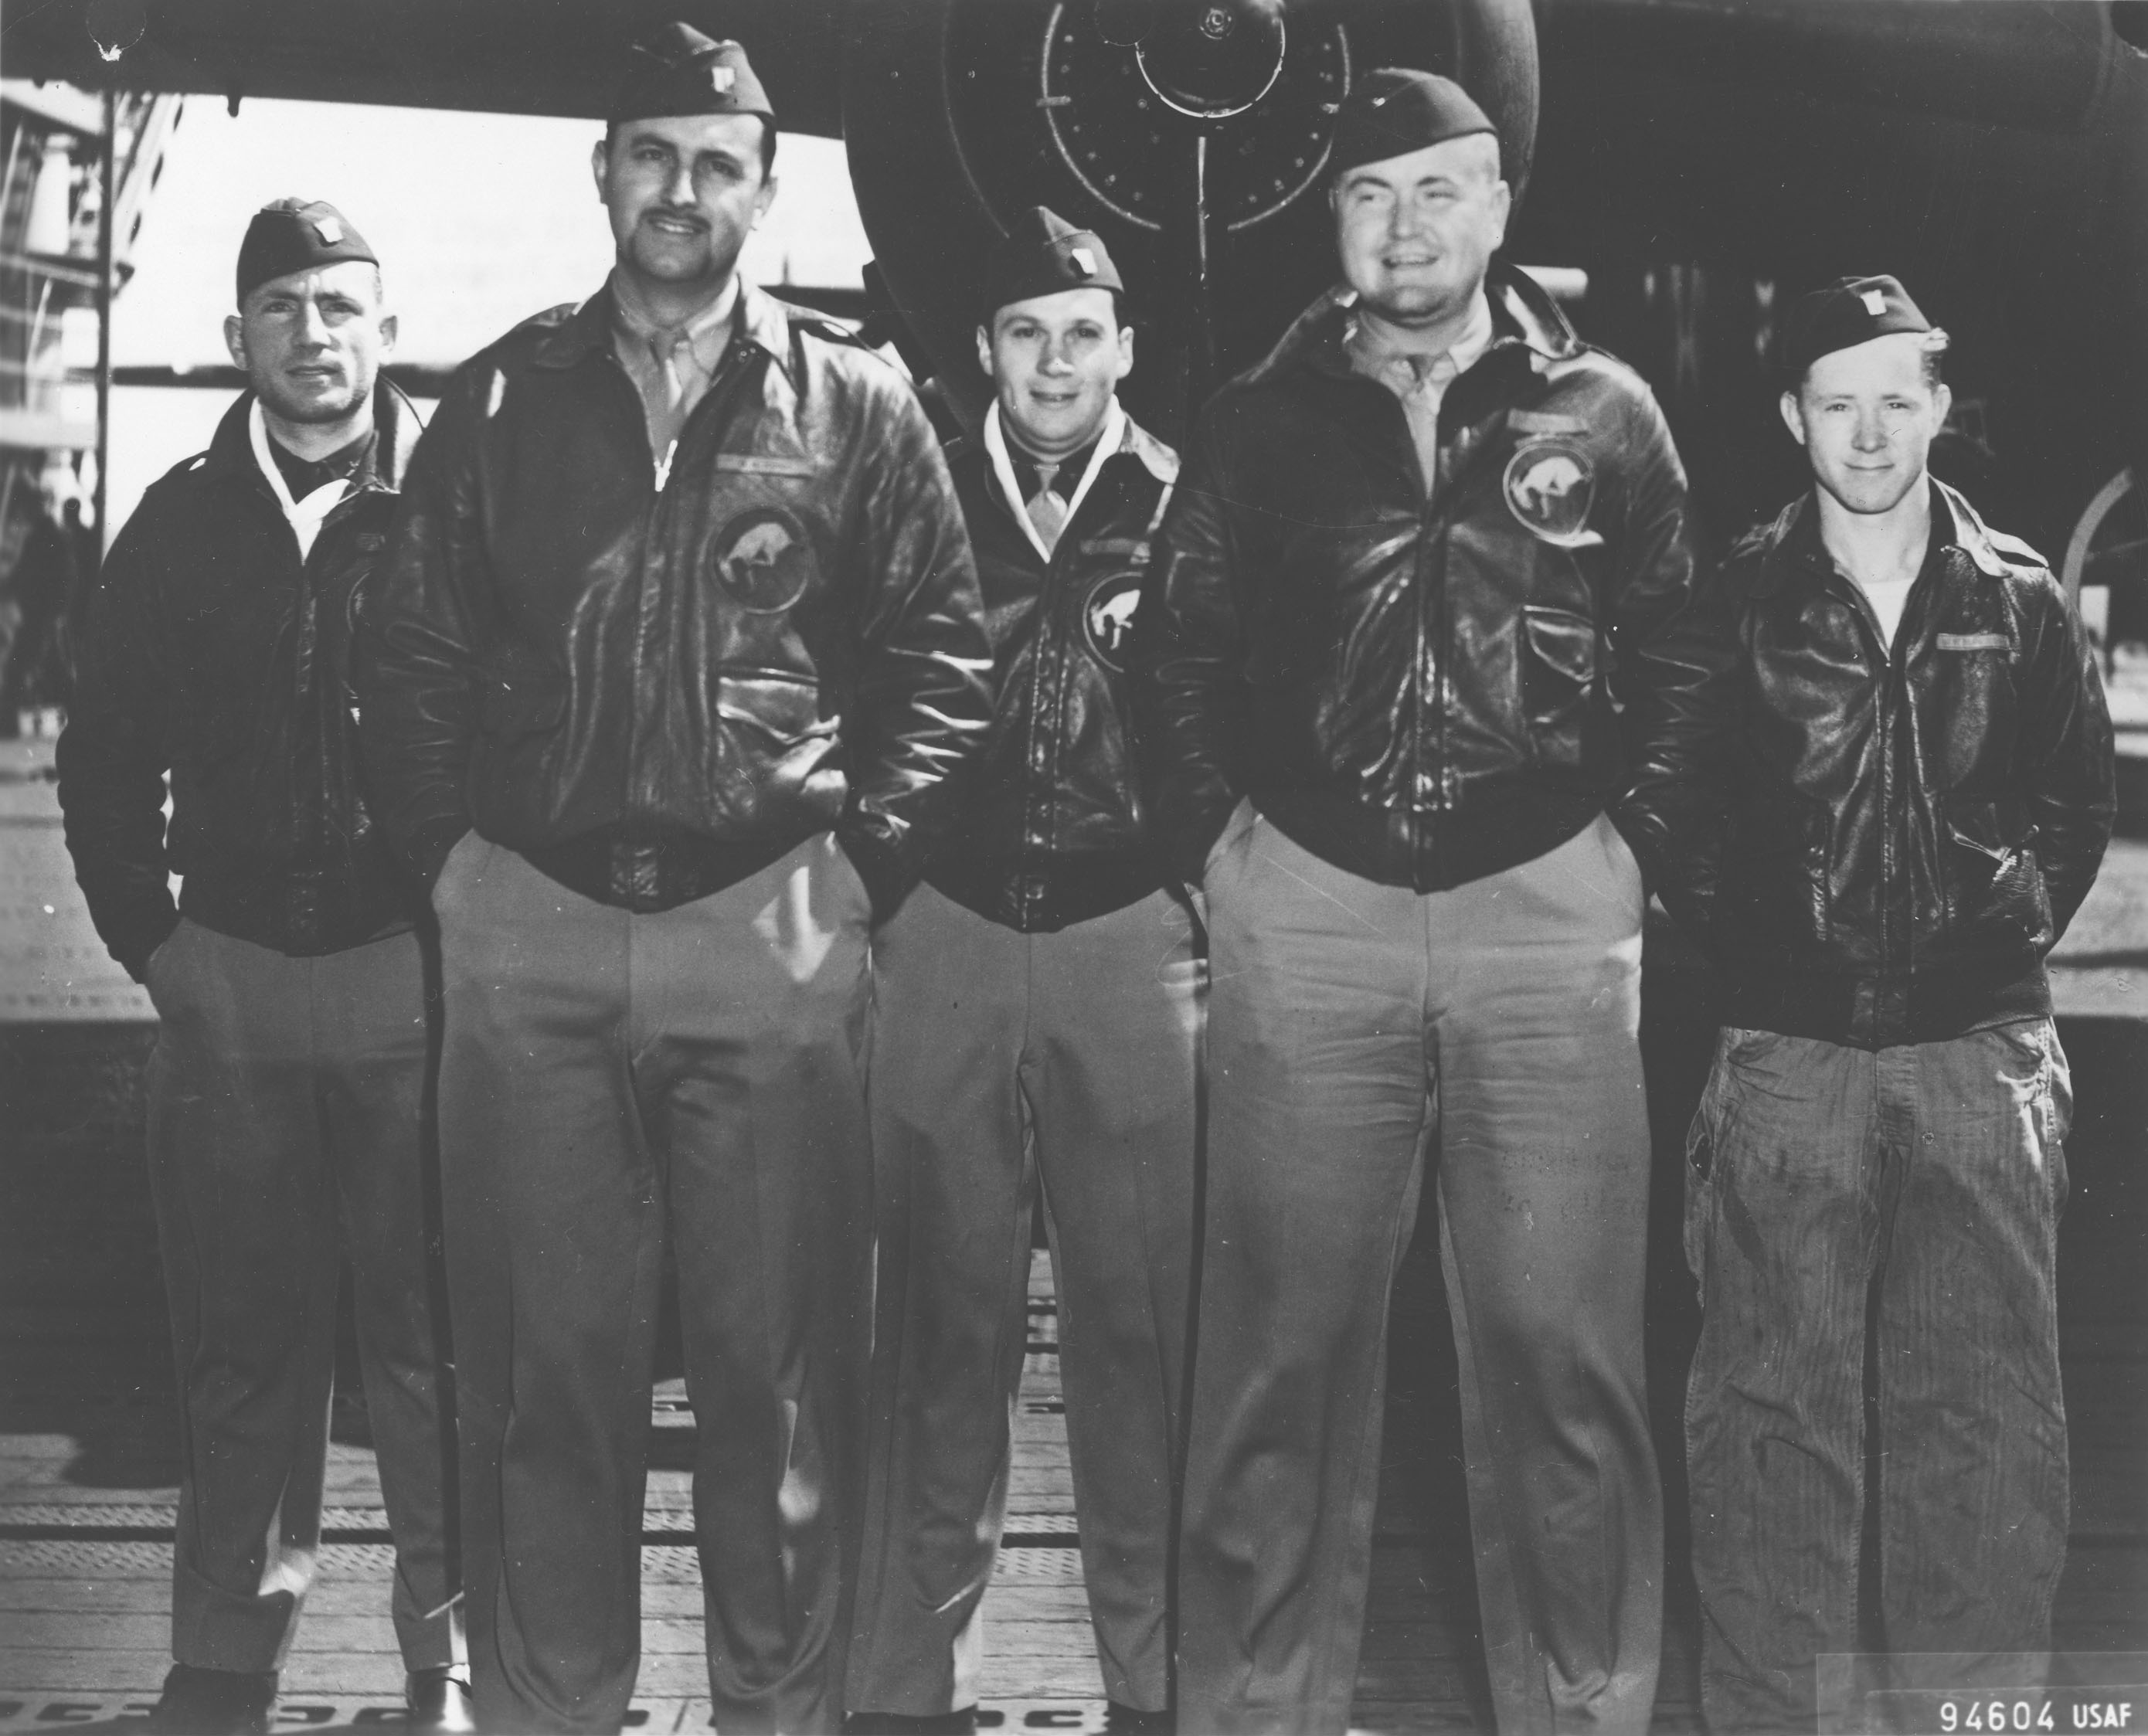
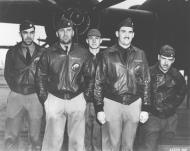
Crew No 03 40-2270 B-25B Mitchell 17BG34BS Whiskey Pete Doolittle Tokyo raiders 01
Crew #3 SN 40-2270
Pilot: Lt. R. M. Gray Co-Pilot: Lt. J. E. Manch Navigator: Lt. C. J. Ozuk Bombardier: Sgt. A. E. Jones Engineer/Gunner: Cpl. L. D. Faktor The third B-25 to launch from the deck of the Hornet, Lt. R. M. Gray guided his B-25 toward Tokyo. Reaching the coastline due east of Yokohama about 20 minutes after the first two crews had released their bombs. This time delay had allowed the Japanese vital time to recover from the initial shock of the first attacks. The crew of the third B-25 was met with intense flak. They dropped their bombs on their targets in four individual bomb runs. Their targets; a steel mill, chemical factory, and gas company were hit. The only incendiary bomb was dropped in a densely populated small factory district. Heavy smoke blew into the sky. They turned west and utilized the .30 caliber nose gun as they fought their way toward China. They were unable to see the coastline due to the weather conditions as they flew into China. The pilot saw some lights through the clouds and dropped their last two candle bombs in search for a place to land. Unable to find a safe landing area and fuel running out, he ordered the crew to bail out of the B-25. They were flying over a mountainous area of Zhejiang province. During this bail out, Cpl. Leland D. Faktor died as he fell down a cliff. The others landed safely and were escorted to Chuchow over the next few days. Cpl. Faktor was the first casualty of the raid.
After the raid: Lieutenant Gray and Sergeant Jones would join the 22nd Bomb Squadron and continue to fly B-25s. Lieutenant Manch joined the 11th Bomb Squadron flying B-25s to be joined later by Sergeant Gray. Sergeant Gray was killed in action in October of 1942. Sergeant Jones later transferred to the 490th, continuing to fly B-25s in the CBI.
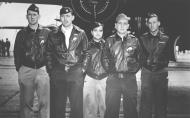
Crew No 04 40-2282 B-25B Mitchell 17BG34BS Doolittle Tokyo raiders 01
Crew #4 SN 40-2282
Pilot: Lt. E. W. Holstrom Co-Pilot: Lt. L. N. Youngblood Navigator: Lt. H. C. McCool Bombardier: Sgt. R. J. Stephens Engineer/Gunner: Cpl. B. M. Jordan The fourth bomber to leave the Hornet did so without incident. As they settled in for the long flight to Japan, the gunner decided to test the guns. Corporal Jordan soon learned the turret was unresponsive. Unknown to him, the electrical lead was not connected. The .50 caliber guns would be useless. He also noticed that the left wing tank had developed a leak. This would be an issue on several of the raid modified B-25s. Unbeknownst to the crew, their compass was off by as much as 15 degrees. This caused the bomber to make landfall well south of their intended location. After identifying their location, the map revealed they were 75 miles south of Tokyo. Their intended targets were a clothing depot and powder magazine in northern Tokyo. The crew was aware they were well behind the first group of planes and knew they would not have the element of surprise afforded the previous group. Alternate targets of an oil storage tank farm and troop barracks were chosen. As they headed toward land, they were bet by Japanese bombers and fighters. Low on gas and without usable .50 caliber guns, they decided to outrun their opponents. Taking fire from the Japanese fighters, they dropped to 75 feet, disarmed their bombs, and dropped them into the water below. They raced toward China and bailed out over land. All crew found their way to safety.
After the raid: Lieutenants Holstrom and Youngblood would transfer to the 11th Bomb Squadron continuing to fly B-25s in the CBI. The remaining 3 crew would transfer to the 22nd Bomb Squadron. Lieutenant McCool would fly 13 missions in B-25s. Sergeant Stephens flew 33 missions with the 22nd and later the 11th Bomb Squadrons. He was wounded and received a Purple Heart in May of 1943. Corporal Jordan would later transfer to the 490th Bomb Squadron.
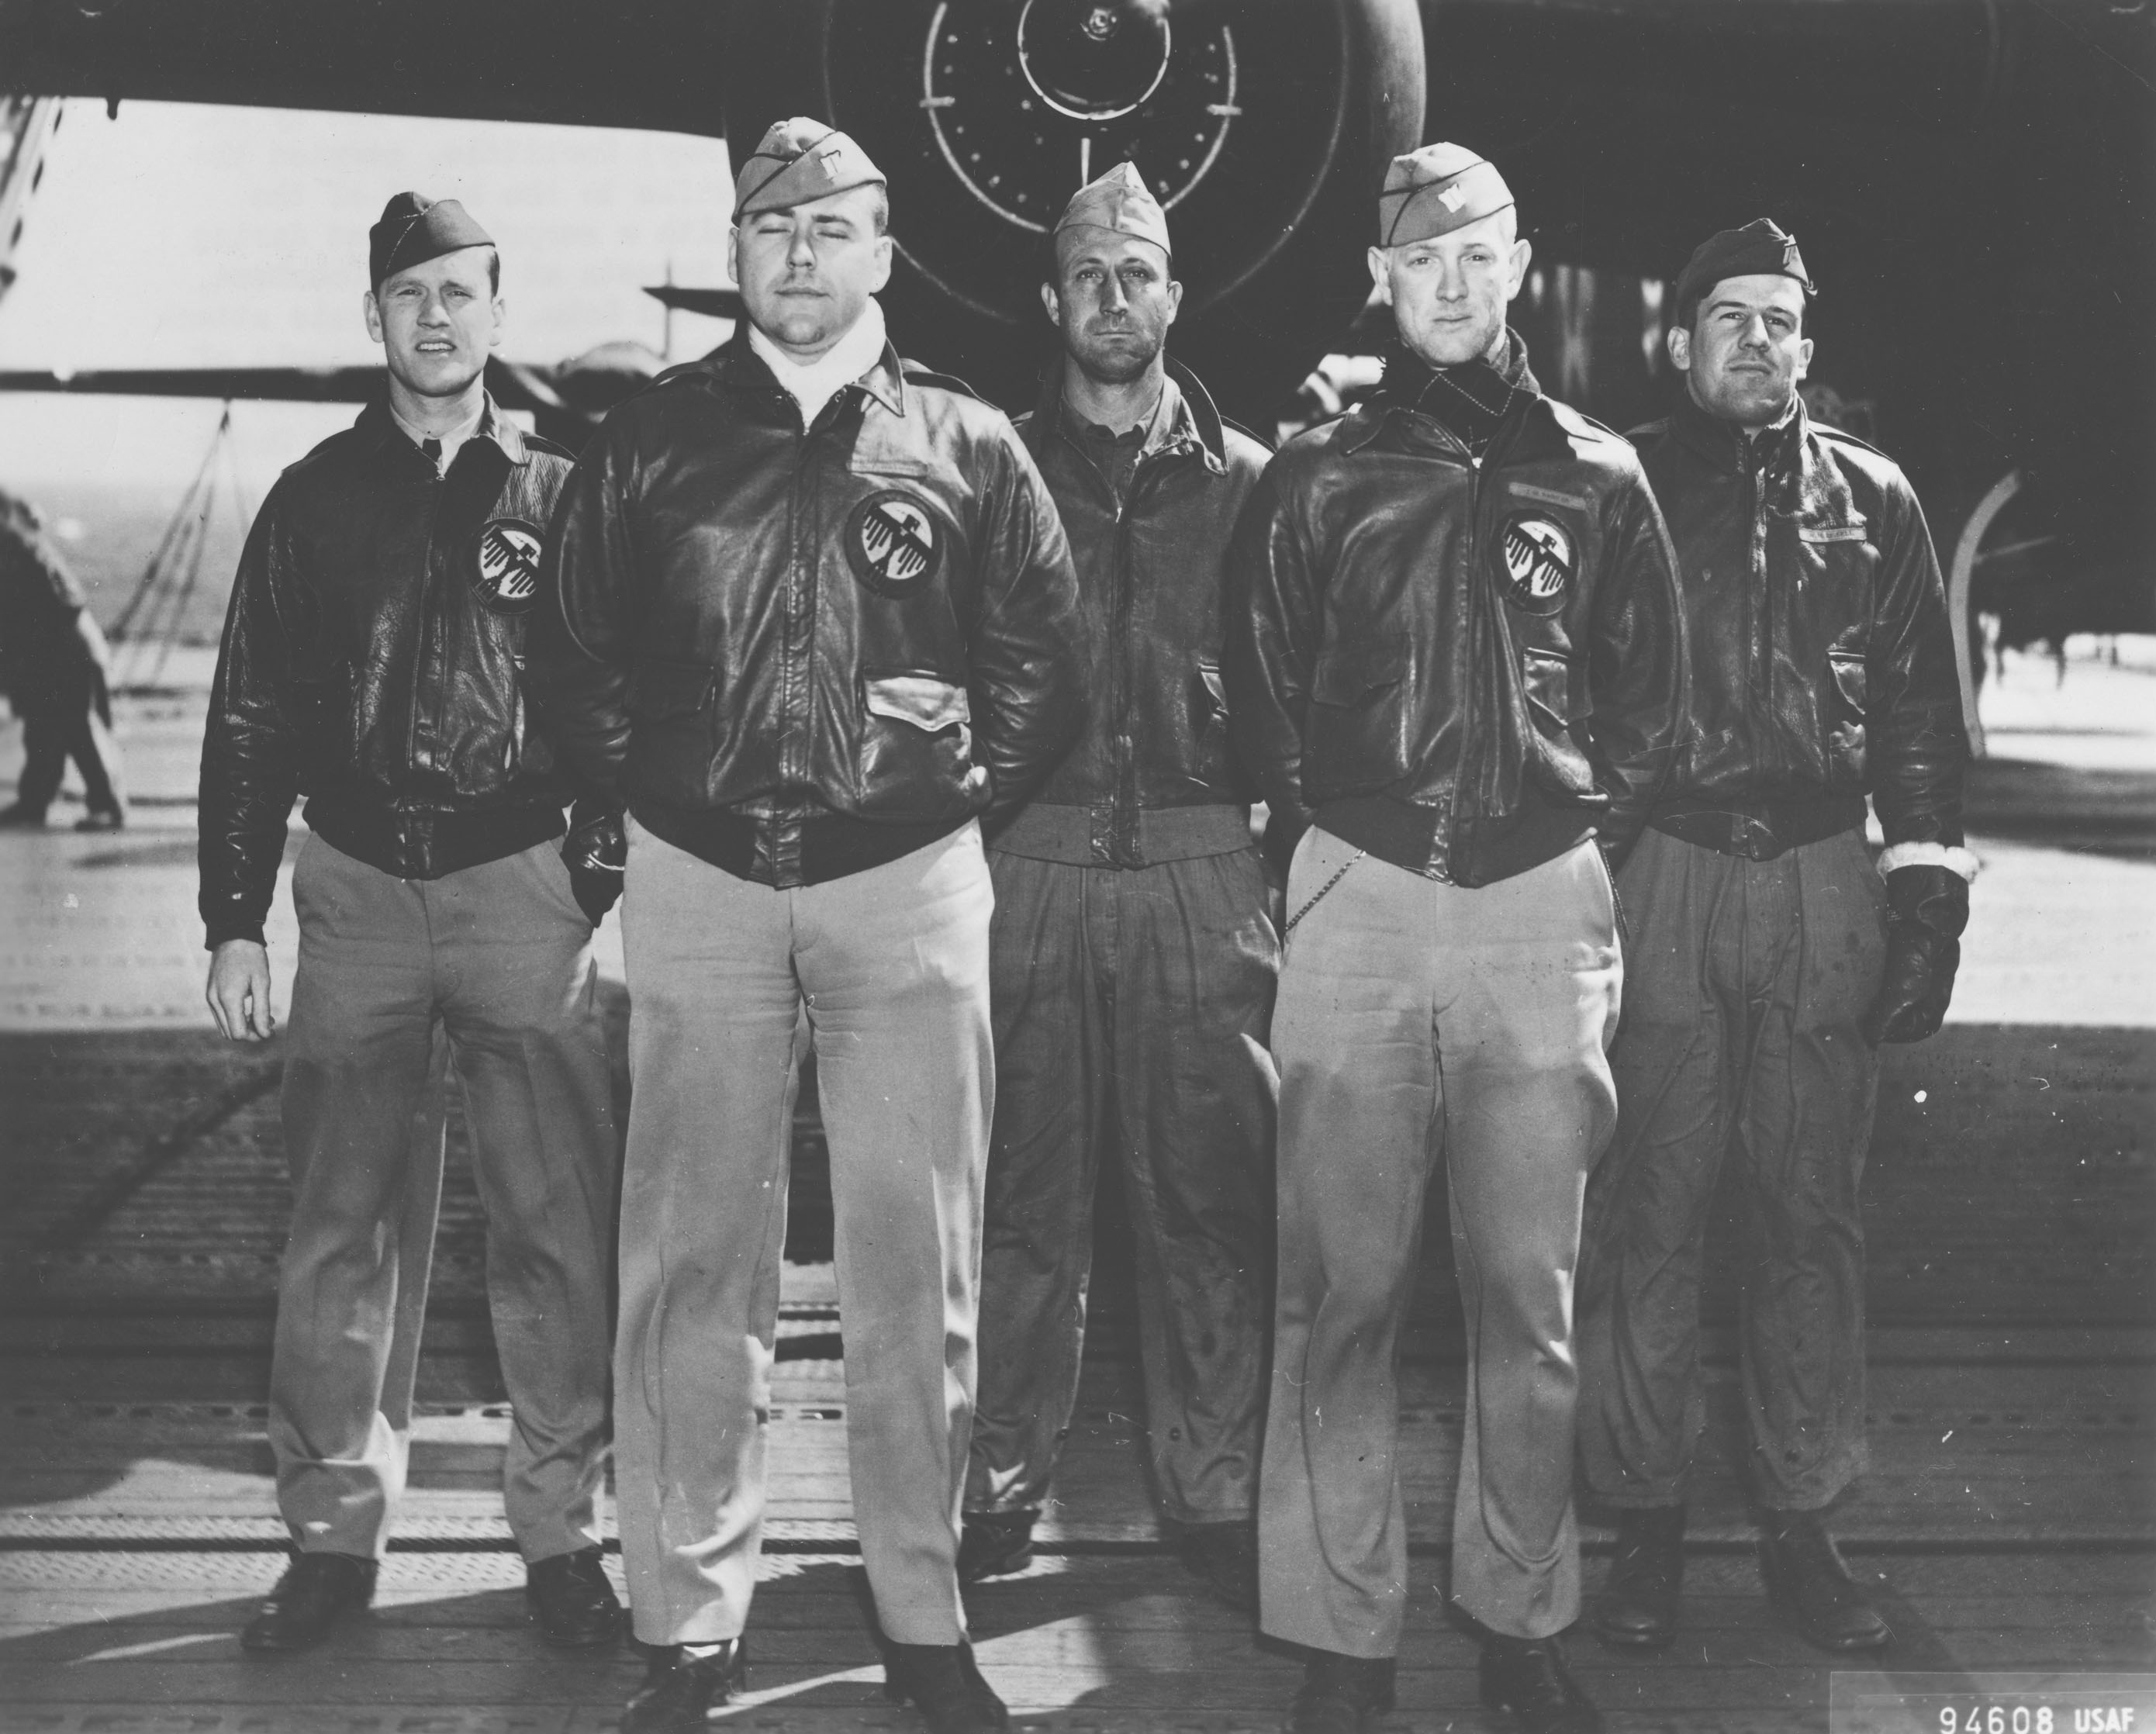
Crew No 05 40-2283 B-25B Mitchell 17BG34BS Doolittle Tokyo raiders 01
Crew #5 SN 40-2283
Pilot: Capt. D. M. Jones Co-Pilot: Lt. R. R. Wilder Navigator: Lt. E. F. McGurl Bombardier: Lt. D. V. Truelove Engineer/Gunner: Sgt. J. W. Manske Shortly after launching from the Hornet, the crew of the fifth B-25 headed due west toward Tokyo. Captain Jones asked his engineer for a report on fuel. He realized his B-25 Mitchell was short thirty gallons of fuel in her left rear tank. At that point, they knew they did not have enough fuel to reach their final destination. Reaching shore just north of the Inubo Saki lighthouse, they were surprised to not face opposition. For the next 20 minutes, they struggled to determine their location. Locating Tokyo Bay, they were able to determine their location. With fuel running low, the decided they could not make their primary targets including an armory east of the Imperial Palace. They chose alternate targets of what appeared to be a brick power plant and an oil tank. After bombing these targets, they identified a large two story factory that looked very similar to the North American Aviation plant in Inglewood, California. They bombed that as well and headed for their last target increasing their speed. After almost missing their last target, they headed toward China on instruments and bailed out near Chuhsien as fuel ran low. All crew found their way to safety.
After the raid: Lieutenant McGurl was killed in action on June 3, 1942 when his plane crashed into mountain after bombing targets in Lashio, Burma. Captain Jones was assigned as acting commander of the 319th Bomb Group on November 20, 1942. He was later assigned as the commander of the 438th Bomb Squadron in North Africa flying the B-26. He was shot down over Bizerte, Lybia and was captured. He was liberated in April of 1945.
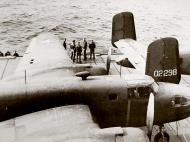
Crew No 06 40-2298 B-25B Mitchell 17BG34BS Green Hornet Doolittle Tokyo raiders 01
Crew #6 SN 40-2298
Pilot: Lt. D. E. Hallmark Co-Pilot: Lt. R. J. Meder Navigator: Lt. C. J. Nielsen Bombardier: Sgt. W. J. Dieter Engineer/Gunner: Cpl. D. E. Fitzmaurice By the time the sixth B-25 was launched off the Hornet, it was becoming almost a routine. As Lt. Hallmark guided his ship toward Tokyo, the crew again marveled at the lack of opposition they initially faced. The peaceful flight was interrupted by heavy flack as they closed in on their targets. One of the Plexiglas windows near the co-pilot was shattered by flack as they rose up to 1,500 feet. Japanese planes were seen overhead at about 10,000 feet. Their targets were the steel mills and foundries in the northeastern corner of Tokyo. These targets were large and should be easy to hit. They indeed were. Their total time over target was just three minutes and they too headed toward China. As they headed toward China, fuel became an issue. The pilot was forced to ditch the plane in the water within sight of the China coast. Sergeant Dieter and Cpl. Fitzmaurice both drowned. Lieutenant Hallmark was also injured but was able to make it to the shore with the other two survivors. The next day, they buried the two men who were lost and tried to reach safety. All three men were captured and interred as Prisoners of War. Lieutenant Hallmark was executed by the Japanese. Lieutenant Meder would later die in a prison camp. Of the five crew members, only Lt. Nielsen would survive the war.
Crew No 07 40-2261 B-25B Mitchell 17BG95BS Ruptured Duck Doolittle Tokyo raiders 01
Crew #7 SN 40-2261
Pilot: Lt. T. W. Lawson Co-Pilot: Lt. D. Davenport Navigator: Lt. C. L. McClure Bombardier: Lt. R. S. Clever Engineer/Gunner: Sgt. D. J. Thatcher The crew of the seventh B-25 Mitchell prepared to launch off the Hornet. As part of his pre-flight checks, Lt. Lawson had had tested the flaps. In his rush, he failed to lower them prior to launch. This mistake became apparent as they disappeared below the bow of the ship. They fought the plane just above the waves as they coaxed the B-25 into steady flight. The crew buzzed a Japanese merchant ship and joked about bombing it. Gunner Sgt. Thatcher also fired up the turret to verify it was working correctly. As they reached the coast, it is interesting to note they were in awe by the beauty of the countryside. As many of the previous crews noted, the general public seemed unaware they were the enemy. As they buzzed through town, the sight of a Japanese flag waving above a school brought their focus back to the task at hand. As they approached Tokyo, they encountered six Japanese fighters racing toward them. One fighter peeled off and started to dive. The crew took the B-25 down to 15 feet and lost sight of the group. They soon saw several large fires, evidence of the success of the crews that had preceded them. They pulled up to 1,400 feet as they entered the flack. Their initial target was the Nippon Machine Works, but they instead targeted a large factory. After they dropped all of their bombs, they headed toward China. As fuel ran low, the crew saw a sandy beach. Estimating they had enough fuel, Lt. Lawson flew low across the beach to assess for landing. He brought the bomber back around and lowered the flaps and wheels. Just a quarter mile from the shore, the engines died and the plane when into the water near the Zhejiang Province. Four of the five men were seriously injured and all were immediately found by two local fishermen. They were taken to a local hospital and had their wounds dressed. Hearing of their medical issues, Lt. T. R. White, M.D. rushed to their location. He would eventually perform a field amputation of the left leg of Lt. Lawson. All would return to the United States after recovery. Sergeant Thatcher is currently one of two surviving raiders
Crew No 08 40-2242 B-25B Mitchell 17BG95BS Doolittle Tokyo raiders 01
Crew #8 SN 40-2242
Pilot: Capt. E. J. York Co-Pilot: Lt. R. G. Emmens Navigator: Lt. N. A. Herndon Bombardier: SSgt. T. H. Laban Engineer/Gunner: Sgt. D. W. Pohl Captain York successfully pulled his B-25 off the flight deck of the Hornet. It should be noted here that Emmens was not present at Eglin Field for the short take off training. He did receive some instruction from Lt. Miller, but there is conflicting information on whether he actually performed a simulated launch using the short take off technique. This bomber most likely was the one that had the carburetors adjusted at McClellan as calculations show she burned an average of 98 gallons per hour. This was far more than the 72 gallons per hour expected from the other B-25s. Reaching the Japanese coast, they flew over what appeared to be an internment camp. Their destination was to be an aircraft engine manufacturing plant on the south side of Tokyo. After flying over land for more than 30 minutes, they started looking for another target. They soon located what appeared to be a power plant. Pulling up to 1,500 feet, they opened the bomb bay doors and released their bombs. Knowing they would not make China, they made the decision to fly toward Vladivostok, Russia. They landed in a field near their destination in hopes of refueling and continuing to China. This B-25 would be the only one to make a wheels-up landing. The crew would be interred for 13 months by the Soviets before escaping into Persia. The B-25 was confiscated and it's fate is unknown.
Crew No 09 40-2303 B-25B Mitchell 17BG95BS Whirling Dervish Doolittle Tokyo raiders 01
Crew #9 SN 40-2303
Pilot: Lt. H. F. Watson Co-Pilot: Lt. J. M. Parker Jr. Navigator: Lt. T. C. Griffin Bombardier: Sgt. W. M. Bissell Engineer/Gunner: Tsgt. E. V. Scott The ninth crew to launch from the Hornet did so without any issues. During the long flight to the coast, their turret tank started leaking. To save as much fuel as possible, fuel was transferred as quickly as possible out of that tank. They flew straight to the coast, arriving just 35 miles north of Tokyo. They were able to see the fires and devastation caused by earlier bomb runs. They encountered heavy anti-aircraft fire as they flew through Tokyo. At some point, a reporter on the ground was able to photograph their flight. This photo would appear in the following morning's paper. Their target, the Kawasaki Truck and Tank plant was soon located and bombed. As they completed their bomb run, a Japanese Zero targeted the B-25 and opened fire. Gunner Tsgt. Scott opened fire on the Zero. As he continued to fire, his sight fogged up. The fighter fell off his left wing and disappeared. Lieutenant Watson turned his B-25 toward China. Three hours out of Tokyo, they spotted two Japanese cruisers and a battleship. One of the cruisers opened fire nearly hitting the B-25. Approximately 100 miles south of Pyong Lake and fuel running low, the crew bailed out. While bailing out of his plane, Lt. Watson was injured. The crew was found and he was taken to Hengyang. He eventually returned to the United States and remained hospitalized until the summer of 1944.
After the raid: Lieutenant Griffin would be assigned to the 319th Bomb Group, 440th Bomb Squadron flying B-26s. He was shot down on July 3, 1943 over Gerbini, Sicily and taken prisoner. He was a P.O.W. until the end of the war.
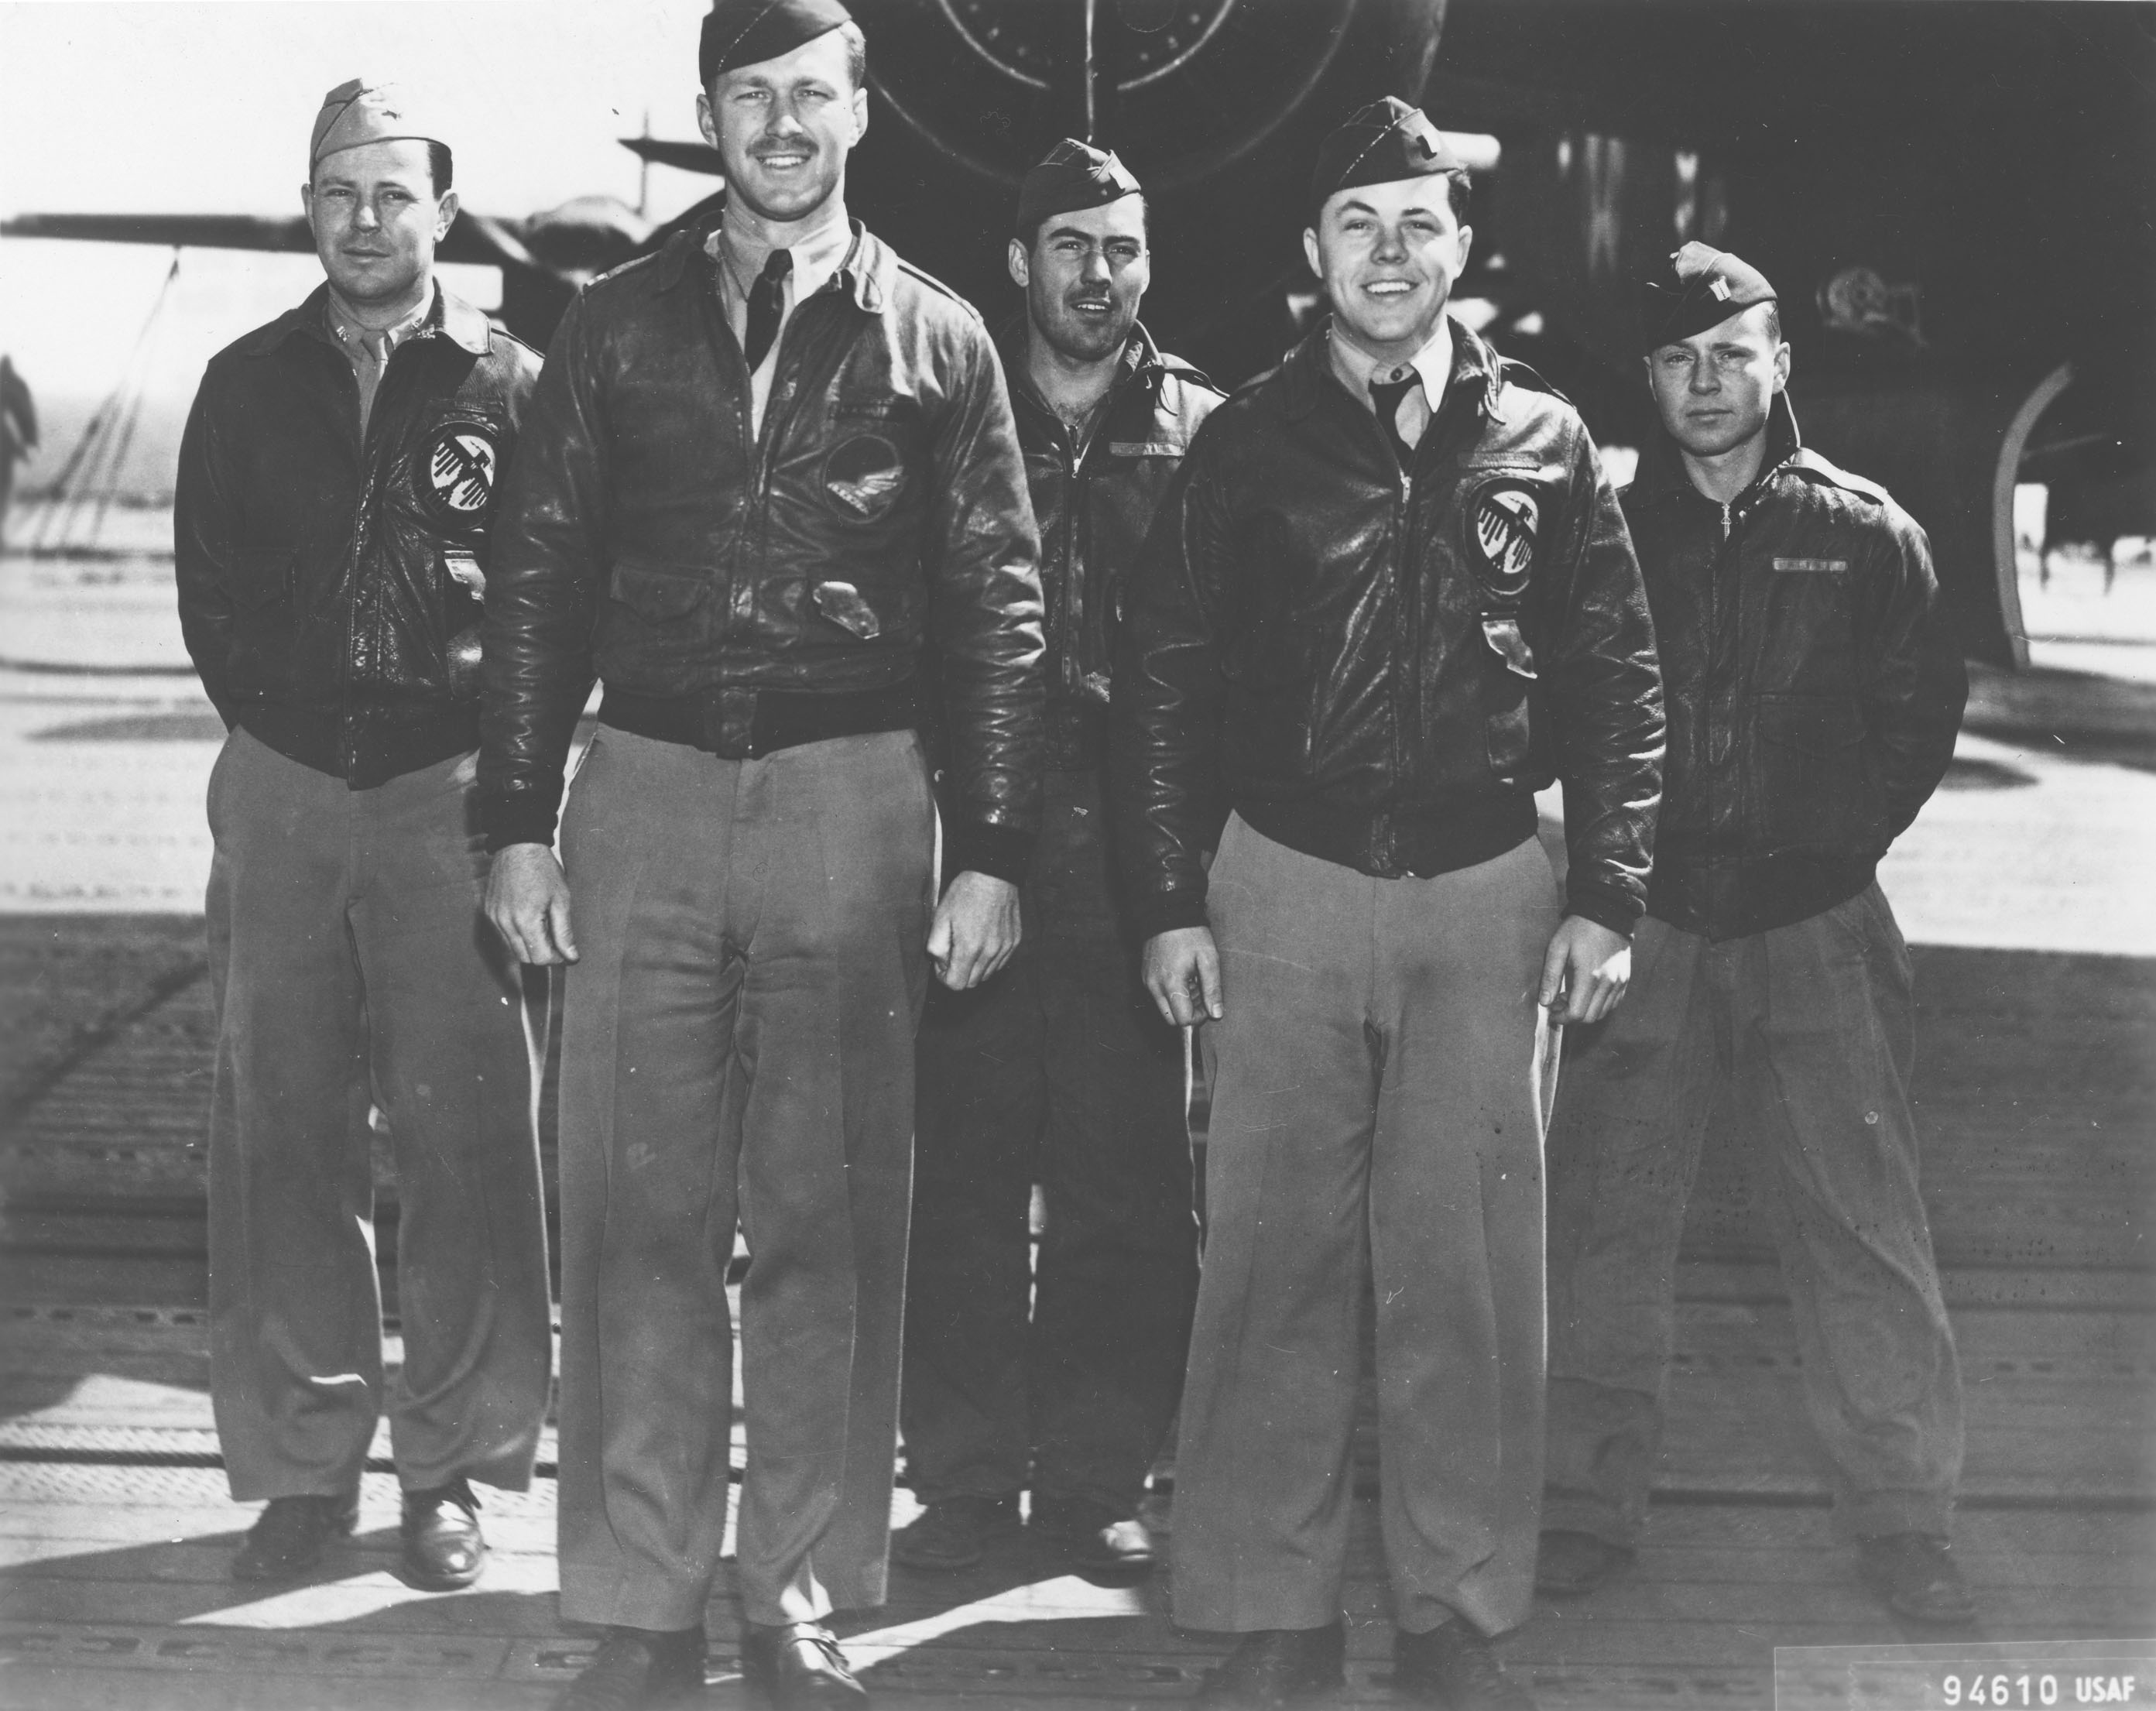
Crew No 10 40-2250 B-25B Mitchell 17BG89BS Doolittle Tokyo raiders 01
Crew #10 SN 40-2250
Pilot: Lt. R. O. Joyce Co-Pilot: Lt. J. R. Stork Navigator/Bombardier: Lt. H. E. Crouch Engineer/Gunner: Sgt. G. E. Larkin Jr. Gunner: SSgt. E. W. Horton Jr. Pilot Lt. Joyce expected some opposition flying to Japan and chose to fly at a higher altitude than previous crews. His target would be the Japan Special Steel Company plants and warehouses in the southern end of Tokyo. As he headed past Tokyo Bay, the Yokosuka naval base opened fire. Passing through without issues, the crew released their bombs on their target. After their bomb run, the flack continued. One shell exploded close to the Mitchell and ripped an 8 inch hole in the fuselage. This would be the only significant damage caused by the Japanese on the raid. Nine enemy fighters tracked the B-25 with two immediately attacking. Lieutenant Joyce pushed the stick forward and dove under the fighters. The dramatic increase in speed and steep dive caused the ammo to tangle in the turret. The gunner struggled to bring the .50 caliber machine guns back into service as Lt. Joyce evaded the enemy fighters. Once the B-25 was able to return fire, they were able to outpace their enemy and lose them in the clouds. The crew turned their attention to making the China coast. Running low on fuel, they safely bailed out and reached Chuhsien within 4 days. The entire crew would remain in China flying B-25s well into 1943.
After the raid: With the exception of Lieutenant Stork, the entire crew would be assigned to the 11th Bomb Squadron flying B-25s in the CBI.
Crew No 11 40-2249 B-25B Mitchell 17BG34BS Hari Kari er Doolittle Tokyo raiders 01
Crew #11 SN 40-2249
Pilot: Capt. C. R. Greening Co-Pilot: Lt. K. E. Reddy Navigator: Lt. F. A. Kappeler Bombardier: SSgt. W. L. Birch Engineer/Gunner: Sgt. M. J. Gardner The eleventh B-25 to launch off the Hornet was the first bomber of the fourth wave. The remaining B-25s would target areas outside of the Japanese capital. Flying towards Japan, the eleventh, twelfth, and thirteenth bombers flew close together until they reached the coast. Captain Greening brought his B-25 ashore northeast of Tokyo. The crew was flying across Kasumigaura Lake when four Japanese fighters attacked. Sergeant Gardner let loose from the turret and brought two fighters down. One of the fighters was on fire, but neither were seen to hit the ground. The other fighters backed off until the turret jammed and the motor burned out. Smoke filled the back of the B-25 as Capt. Greening evaded the remaining fighters. One of the fighters landed about fifteen hits on the B-25. Under attack from the Japanese, Capt. Greening knew he could not make his original target, an oil refinery in Yokohama. Ahead, they saw what appeared to be refinery pipelines and tanks camouflaged by thatched roofs. Pulling up to just 600 feet, SSgt. Birch released their bombs on target. The explosions rocked the bomber causing both the pilot and co-pilot to hit their head on the top of the cockpit. Lieutenant Reddy would suffer a cut on his head. Outrunning their opposition, they headed toward China. Over the East China Sea, the crew spotted a Japanese picket boat and opened fire. Reaching China, the crew headed as far inland as they could with the fuel they had. Running low on fuel, Captain Greening ordered his crew to bail out in a mountainous area that bordered the Zhejian and Anhui provinces. Bailing out, Sergeant Gardner sprained both ankles. The entire crew made it safely to Chuhsien.
After the raid: Lieutenant Kappeler was assigned to the 22nd Bomb Squadron flying B-25s. On June 2, 1942, Sergeant Gardner was killed in action after bombing mission on Lashio, Burma. Captain Greening rejoined the 17th Bomb Group, 95th Bomb Squadron now flying B-26s. He was shot down on July 17, 1943 over Naples, Italy and was captured. He was a P.O.W. until the end of the war.
Crew No 12 40-2278 B-25B Mitchell 17BG37BS Fickle Finger Doolittle Tokyo raiders 01
Crew #12 SN 40-2278
Pilot: Lt. W. M. Bower Co-Pilot: Lt. T. Blanton Navigator: Lt. W. R. Pound Jr. Bombardier: TSgt. W. J. Bither Engineer/Gunner: SSgt. O. A. Duquette Lieutenant Bower brought his B-25 ashore just north of Choshi, due east of Tokyo. Their navigator struggled to find their location as they zig-zagged down the shoreline. The pilot, Lt. Bower chose to fly as low as possible across the countryside. He wrote in his diary that he " became a busy boy trying to harvest the rice crop for the natives". The initial target for this crew was the Yokohama dockyards. Arriving at their target, they noticed barrage balloons completely encircling the dockyards. Reacting quickly, they located what appeared to be an oil refinery. After dropping all their bombs, Lt. Bower dove as low as he could fly and headed toward China. On their flight to China, they strafed a Japanese weather boat, sinking it. Flying as far inland as possible with the fuel on board, they bailed out over China. Sergeant Duquette broke his foot when he landed on the ground. The entire crew was located by local Chinese and met up with the crew of plane #10 on their journey to Chuhsien.
After the raid: Sergeant Duquette was assigned to the 11th Bomb Squadron flying B-25s. He was killed on June 3, 1942 when his plane crashed after bombing Lashio, Burma. Lieutenant Blanton was initially assigned to the 22nd and later the 491st Bomb Squadrons. Lieutenant Bower was assigned to the 310th Bomb Group, 428th Bomb Squadron flying B-26s. He was the squadron commander of the 428th through September of 1945.
Crew No 13 40-2247 B-25B Mitchell 17BG37BS Avenger Doolittle Tokyo raiders 01
Crew #13 SN 40-2247
Pilot: Lt. E. E. McElroy Co-Pilot: Lt. R. A. Knobloch Navigator: Lt. C. J. Campbell Bombardier: Sgt. R. C. Burgeois Engineer/Gunner: Sgt. A. R. Williams The launch of the thirteenth bomber from the Hornet was uneventful as was the flight to Japan. When they reached the coast, they discovered they were about 50 miles north of their intended landfall. Lieutenant McElroy headed back out to sea as he turned south to his destination, the Yokosuka Naval Base. The crew identified the submarine tender Taigei being converted into a carrier in the dry docks. Lieutenant McElroy pulled up to 1,300 feet as the bombardier set his sights. The damage they would inflict on the Taigei would set back the conversion of that ship for another 4 months. The co-pilot had purchased a camera at the Sacramento Air Depot. He and the navigator took several pictures that survived the raid. After a successful bombing run, Lt. McElroy turned his B-25 toward China. Running out of fuel over China, the crew bailed out. They made their way to Chuhsien three days later. The entire crew stayed in the theater for the next year.
After the raid: Lieutenant Campbell and Sergeant Williams would transfer to the 11th Bomb Squadron flying B-25s in the CBI. The remaining 3 would transfer to the 22nd Bomb Squadron. Lieutenant McElroy and Sergeant Burgeois would later transfer to the 491st Bomb Squadron and continue to fly B-25s. Lieutenant Knobloch would later transfer to the 490th Bomb Squadron.
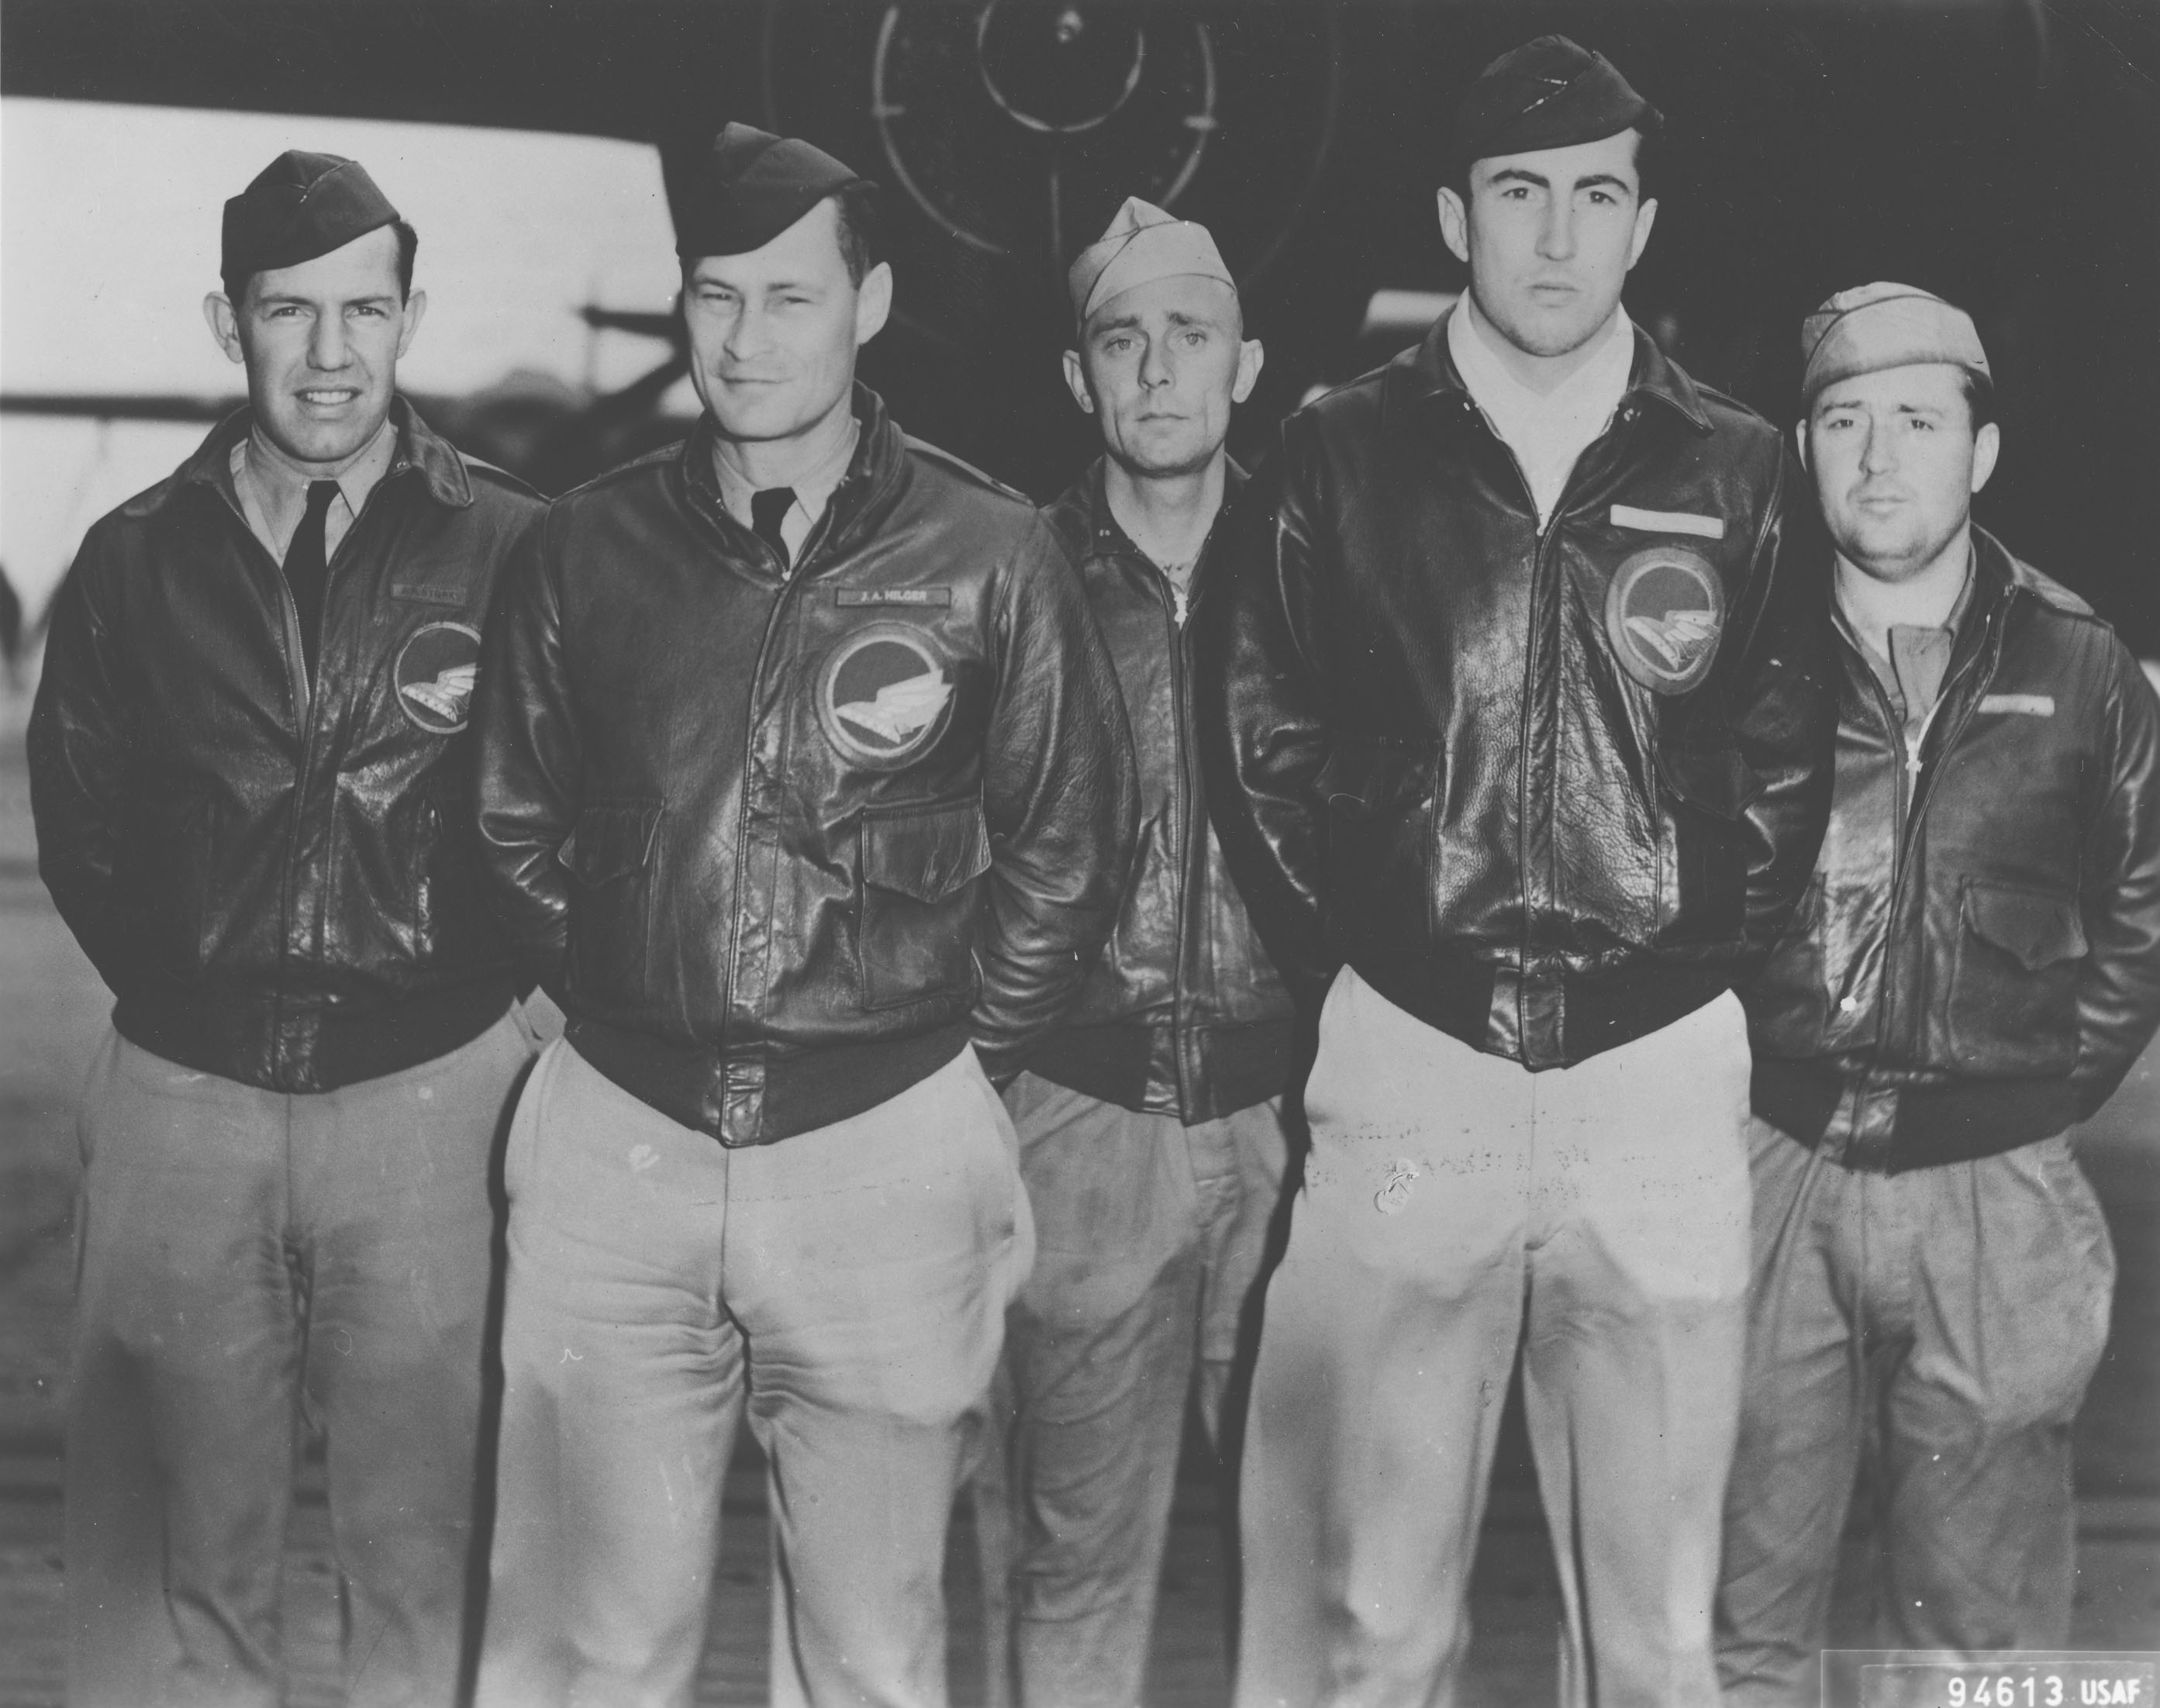
Crew No 14 40-2297 B-25B Mitchell 17BG37BS Doolittle Tokyo raiders 01
Crew #14 SN 40-2297
Pilot: Maj. J. A. Hilger Co-Pilot: Lt. J. A. Sims Navigator/Bombardier: Lt. J. H. Macia Jr. Radio/Gunner: SSgt. E. V. Bain Engineer/Gunner: SSgt. J. Eierman Major Hilger took to this mission from a more personal perspective. The Japanese had recently sank the destroyer "Pillsbury" with his younger brother on board. His launch from the Hornet went without issue. Lieutenant Smith, pilot of the fifteenth B-25 to launch, caught up to Major Hilger and the two headed toward the Japanese coast. The two separated as Major Hilger banked southwest headed toward Nagoya Bay. The crew had selected several targets in Nagoya. As they headed for their first, antiaircraft batteries opened fire. The first target was the army barracks. Dropping their first bomb, they headed to the oil and gasoline storage warehouses. They bombed the largest building in that cluster and then bombed the arsenal. The last target was the Mitsubishi Aircraft Works. Sergeant Bain dropped their last bomb dead center of the building. As they headed out of Nagoya, they fired on tow oil storage tanks. Major Hilger turned his bomber toward China and headed back out to sea. Running low on fuel, Major Hilger ordered his crew to bail out over China. All were unhurt and reached safety within two days.
Crew No 15 40-2267 B-25B Mitchell 17BG89BS TNT Doolittle Tokyo raiders 01
Crew #15 SN 40-2267
Pilot: Lt. D. G. Smith Co-Pilot: Lt. G. P. Williams Navigator/Bombardier: Lt. H. A. Sessler Flight Surgeon/Gunner: Lt. T. R. White MD Engineer/Gunner: Sgt. E. J. Saylor Lieutenant Smith would launch off the Hornet and catch up to Major Hilger and his B-25 on their long flight to Japan. They were listening to Japanese radio station JOAK when an alarm interrupted the broadcast about 1:25 pm. They could not understand what was being said, but it sounded as if the announcer was shouting about three words. This would be repeated about 10 times before the station went silent. The crew then knew the raid had begun. Reaching Nagoya Bay, Lieutenant Smith headed toward Nagoya with no opposition. Lieutenant Sessler spotted the steel foundries and the bombing run would begin. After unloading their first bomb on the steel foundries, the second targeted the Kawasaki Dockyard Company. Their third bomb fell just west of the Electric Machinery Works. Their final bomb targeted the Kawasaki aircraft factory. As they completed their bomb run, the antiaircraft batteries opened up. Lieutenant Smith turned his bomber toward China. As he reached the China coast, he saw the mountain peaks of the Tantou Mountain island near the Zhejian Province. Without enough fuel to clear the mountain, Lt. Smith chose to ditch the plane off the coast near Sangchow. All crew members left the plane before it sank safely. Doc White tried in vain to locate his medicine box, but was able to recover a surgical instrument box. The crew was assisted by Ma Liang Shui, a local fisherman. He gave the crew clothing and helped them through a Japanese blockade to safety. When Doc White heard of the injuries to to Lt. Lawson, he rushed to his location to assist with his care. With the supplies recovered from their crashed B-25 Doc White was able to perform a field amputation on Lt. Lawson to save his live. Years later, Doc would regret his inability to find the medicine box. With the vital medications inside, Doc may have been able to save Lt. Lawson's leg.
Crew No 16 40-2268 B-25B Mitchell 17BG34BS Bat Out of Hell Doolittle Tokyo raiders 01
Crew #16 SN 40-2268
Pilot: Lt. W. G. Farrow Co-Pilot: Lt. R. L. Hite Navigator: Lt. T. Barr Bombardier: Cpl. J. DeShazer Engineer/Gunner: Sgt. H. A. Spatz The troubles for the last B-25 to launch started while still on the Hornet. Seaman First Class Robert Wall stumbled into the propeller of the left prop during engine warm-up. His arm would later be amputated. While moving the aircraft around in the strong winds, a hole was punched in the nose of their B-25 by the back of the fifteenth bomber. This would serve as an ominous warning for the crew. Lieutenant Farrow continued his flight toward Japan. He flew as low as he could until he spotted Japanese fighters. Raising his altitude to seven thousand feet, they hid in the clouds headed toward Nagoya. Reaching their target, they dove through the clouds and targeted an oil refinery below. One of their bombs hit the number 3 tank at the Toho Gas Company. Their final target was Nagoya Aeronautical Manufacturing, the plant that made the Zero fighter. They hit their target, though damage was light. Lieutenant Farrow turned west and headed to China. They were close to enemy territory over Nangchang city when they were forced to bail out due to low fuel. All of the crew were captured before noon. Both Lt. Farrow and Sgt. Spatz were executed by the Japanese. The remaining three were held as P.O.W.s for the rest of the war.
- B-25 Mitchell
IL-2 Sturmovik 'Cliff's of Dover' Blitz - has no 3D model
IL-2 Sturmovik Battle of Normandy
DCS World - has no 3D model
Pandaveswar India Map
Karachi South Karachi City, Sindh Pakistan Map
Pacific Ocean theater of World War II Citations
- Cressman 2000, p. 84.
- Potter & Nimitz 1960, p. 717.
- Potter & Nimitz 1960, pp. 759–60.
- Silverstone 1968, pp. 9–11.
- Potter & Nimitz 1960, pp. 651–62.
- Kafka & Pepperburg 1946, p. 185.
- Potter & Nimitz 1960, p. 751.
- Ofstie 1946, p. 194.
- Potter & Nimitz 1960, p. 761.
- Potter & Nimitz 1960, p. 765.
- Potter & Nimitz 1960, p. 770.
- Ofstie 1946, p. 275..
Pacific Ocean theater of World War II Bibliography:
- Cressman, Robert J. (2000), The Official Chronology of the U.S. Navy in World War II, Annapolis, MD: Naval Institute Press, ISBN 1-55750-149-1.
- Drea, Edward J. (1998), In the Service of the Emperor: Essays on the Imperial Japanese Army, NB: University of Nebraska Press, ISBN 0-8032-1708-0.
- Hakim, Joy (1995), A History of Us: War, Peace and All That Jazz, New York: Oxford University Press, ISBN 0-19-509514-6.
- Kafka, Roger; Pepperburg, Roy L. (1946), Warships of the World, New York: Cornell Maritime Press.
- Miller, Edward S. (2007), War Plan Orange: The U.S. Strategy to Defeat Japan, 1897–1945, US Naval Institute Press, ISBN 978-1-59114-500-4.
- Ofstie, Ralph A. (1946). The Campaigns of the Pacific War. Washington, DC: United States Government Printing Office..
- Potter, E. B.; Nimitz, Chester W. (1960), Sea Power, Prentice-Hal.
- Silverstone, Paul H. (1968), U.S. Warships of World War II, Doubleday & Co.
- Toll, Ian W. (2011). Pacific Crucible: War at Sea in the Pacific, 1941–1942. New York: W. W. Norton.
- The Conquering Tide: War in the Pacific Islands, 1942–1944. New York: W. W. Norton.
- Twilight of the Gods: War in the Western Pacific, 1944–1945. New York: W. W. Norton.
Fifth Air Force Bibliography:
- Bartsch, William H. Doomed at the Start: American Pursuit Pilots in the Philippines, 1941–1942. Reveille Books, 1995. ISBN 0-89096-679-6.
- Birdsall, Steve. Flying Buccaneers: The Illustrated History of Kenney's Fifth Air Force. New York: Doubleday & Company, 1977. ISBN 0-385-03218-8.
- Craven, Wesley F. and James L. Cate. The Army Air Forces in World War II. Chicago: University of Chicago Press, 1948–58.
- Holmes, Tony. "Twelve to One": V Fighter Command Aces of the Pacific. Botley, Oxford, UK: Osprey Publishing, 2004. ISBN 1-84176-784-0.
- Rust, Kenn C. Fifth Air Force Story...in World War II. Temple City, California: Historical Aviation Album, 1973. ISBN 0-911852-75-1.
Notes on the North American B-25 Mitchell
- This number does not include aircraft built after World War II.
- The maximum on RAF strength was 517 in December 1944
Citations on the North American B-25 Mitchell
- 'North American B-25B Mitchell.' U.S. Air Force.
- United Press, 'Bomber Named For Mitchell', The San Bernardino Daily Sun, San Bernardino, California, Friday 23 January 1942, Volume 48, page 21.
- Baugher, Joe. 'North American B-25 Mitchell.' American Military Aircraft: US Bomber Aircraft, 6 March 2000.
- Chorlton Aeroplane May 2013, p. 74.
- 'T-6/SNJ/HVD Information (Ray) - NATA'. flynata.org.
- Parker 2013, pp. 77–79, 83, 88, 92.
- Borth 1945, pp. 70, 92, 244.
- Herman 2012, pp. 11, 88, 115, 140–143, 263, 297.
- Johnson, E. R. (2015). American Military Training Aircraft: Fixed and Rotary-Wing Trainers Since 1916. McFarland. p. 162. ISBN 9780786470945.
- Norton 2012, p. 68.
- Pace, 2002 p23
- Pace 2002, p. 6.
- '340th Bomb Group History'. 57thbombwing.com.
- Merriam, Ray, ed. 'U. S. Warplanes of World War II.' World War II Journal, No. 15, 1 July 2000, p. 8.
- Kinzey 1999, pp. 51, 53.
- Yenne 1989, p. 40.
- Kinzey 1999, pp. 52–53.
- Baugher, Joe. North American B-25H Mitchell.' American Military Aircraft: US Bomber Aircraft, 11 March 2000.
- Tallman 1973, pp. 216, 228.
- Higham 1975, 8; Higham 1978, 59.
- 'A Brief history of the B-25.' Archived 3 March 2015 at the Wayback Machine USAF.com. Accessed: 25 May 2015.
- 'Doolittle Park Will Have AF B-25 Bomber'. Playground News (Fort Walton Beach, Florida), Volume 15, Number 7, 10 March 1960, p. 10.
- 'B-25 Makes Last Flight During Ceremony at Eglin'. Playground News (Fort Walton Beach, Florida), Volume 15, Number '17' (actually No. 18: Special), 26 May 1960, p. 2.
- 'B-25 44-330854.' warbirdregistry.org. Retrieved: 30 December 2009.
- 'Closing In: Marines in the Seizure of Iwo Jima (Assault Preparations)'. www.nps.gov.
- 'Smash Hits.' Popular Mechanics, March 1947, p. 113.
- Skaarup 2009, pp. 333–334.
- Walker, R.W.R. 'RCAF 5200 to 5249, Detailed List.' Canadian Military Aircraft Serial Numbers, 25 May 2013.
- Hardesty, Von (1982). Red Phoenix: The Rise of Soviet Air Power 1941-1945. Washington, D. C.: Smithsonian Institution Press. p. 253. ISBN 0874745101.
- Glantz, David (2005). Companion to Colossus Reborn: Key Documents and Statistics. United States of America: University Press of Kansas. p. 148. ISBN 0700613595.
- Jowett, Philip (2016). Modern African Wars (5): The Nigerian-Biafran War 1967-70. Oxford: Osprey Publishing Press. p. 18. ISBN 978-1472816092.
- Dorr Wings of Fame Volume 3, p. 124.
- 'Factsheets: North American B-25.' National Museum of the United States Air Force, 26 June 2009.
- 'Factsheets: North American B-25A'. National Museum of the U.S. Air Force, 26 June 2009.
- Dorr Wings of Fame Volume 3, pp. 125–126.
- 'Factsheets: North American B-25B.' National Museum of the U.S. Air Force, 26 June 2009.
- Robison, Tom. 'B-29 in Weather Reconnaissance.' Aerial Weather Reconnaissance Association: Hurricane Hunters.
- Gibbins, Scott and Jeffrey Long. 'The History of the Hurricane Hunters.' Archived 12 September 2010 at the Wayback Machine Hurricane Hunters Association.
- Drucker, Graham.'North American B-25 Mitchell.' fleetairarmarchive.net.
- 'B-25J-30-NC SN 44-31173 'Huaira Bajo''. The B-25 History Project
- Chorlton Aeroplane May 2013, p. 85.
- Chorlton Aeroplane May 2013, p. 86.
- Hagedorn Air Enthusiast May/June 2003, pp. 53–54.
- Hagedorn Air Enthusiast May/June 2003, p. 55.
- Leeuw, Ruud. 'Cuatro Vientos – Madrid.' ruudleeuw.com.
- Hardesty 1991, p. 253.
- 'Mitchells: The North American Mitchell in Royal Air Force service.' Aeromilitaria (Air-Britain Historians), Issue 2, 1978, pp. 41–48.
- Roberts, William.'ESB News.' Elevator World, March 1996.
- Kingwell 2007, p. 12.
- Fonton, Mickaël (5 August 2010). 'Les morts mystérieuses : 4. Leclerc, l'énigme du 13e passager'. Valeurs actuelles (in French).
- Swanborough and Bowers 1963, p. 359.
- Lednicer, David. 'The Incomplete Guide to Airfoil Usage'. m-selig.ae.illinois.edu.
- Caiden 1957, p. 176.
Bibliography on the North American B-25 Mitchell: +
- Borth, Christy. Masters of Mass Production. Indianapolis, Indiana: Bobbs-Merrill Co., 1945.
- Bridgman, Leonard, ed. 'The North American Mitchell.' Jane's Fighting Aircraft of World War II. London: Studio, 1946. ISBN 1-85170-493-0.
- Caidin, Martin. Air Force. New York: Arno Press, 1957.
- Chorlton, Martyn. 'Database: North American B-25 Mitchell'. Aeroplane, Vol. 41, No. 5, May 2013. pp. 69–86.
- Dorr, Robert F. 'North American B-25 Variant Briefing'. Wings of Fame, Volume 3, 1996. London: Aerospace Publishing. ISBN 1-874023-70-0. ISSN 1361-2034. pp. 118–141.
- Green, William. Famous Bombers of the Second World War. New York: Doubleday & Company, 1975. ISBN 0-385-12467-8.
- Hagedorn, Dan. 'Latin Mitchells: North American B-25s in South America, Part One'. Air Enthusiast No. 105, May/June 2003. pp. 52–55. ISSN 0143-5450
- Hagedorn, Dan. 'Latin Mitchells: North American B-25s in South America, Part Three'. Air Enthusiast Mo. 107, September/October 2003. pp. 36–41. ISSN 0143-5450
- Hardesty, Von. Red Phoenix: The Rise of Soviet Air Power 1941–1945. Washington, D.C.: Smithsonian Institution, 1991, first edition 1982. ISBN 0-87474-510-1.
- Heller, Joseph. Catch 22. New York: Simon & Schuster, 1961. ISBN 0-684-83339-5.
- Herman, Arthur. Freedom's Forge: How American Business Produced Victory in World War II, New York: Random House, 2012. ISBN 978-1-4000-6964-4.
- Higham, Roy and Carol Williams, eds. Flying Combat Aircraft of USAAF-USAF (Vol. 1). Andrews AFB, Maryland: Air Force Historical Foundation, 1975. ISBN 0-8138-0325-X.
- Higham, Roy and Carol Williams, eds. Flying Combat Aircraft of USAAF-USAF (Vol. 2). Andrews AFB, Maryland: Air Force Historical Foundation, 1978. ISBN 0-8138-0375-6.
- Johnsen, Frederick A. North American B-25 Mitchell. Stillwater, Minnesota: Voyageur Press, 1997. ISBN 0-933424-77-9.
- Kingwell, Mark. Nearest Thing to Heaven: The Empire State Building and American Dreams. New Haven, Connecticut: Yale University Press, 2007. ISBN 978-0-300-12612-9.
- Kinzey, Bert. B-25 Mitchell in Detail. Carrollton, Texas: Squadron/Signal Publications Inc., 1999. ISBN 1-888974-13-3.
- Kit, Mister and Jean-Pierre De Cock. North American B-25 Mitchell (in French). Paris, France: Éditions Atlas, 1980.
- McDowell, Ernest R. B-25 Mitchell in Action (Aircraft number 34). Carrollton, Texas: Squadron/Signal Publications Inc., 1978. ISBN 0-89747-033-8.
- McDowell, Ernest R. North American B-25A/J Mitchell (Aircam No.22). Canterbury, Kent, UK: Osprey Publications Ltd., 1971. ISBN 0-85045-027-6.
- Mizrahi, J.V. North American B-25: The Full Story of World War II's Classic Medium. Hollywood, California: Challenge Publications Inc., 1965.
- Norton, Bill. American Bomber Aircraft Development in World War 2. Hersham, Surrey, UK: Midland Publishing, 2012. ISBN 978-1-85780-330-3.
- Pace, Steve. B-25 Mitchell Units in the MTO. Oxford, UK: Osprey Publishing, 2002. ISBN 978-1-84176-284-5.
- Pace, Steve. Warbird History: B-25 Mitchell. St. Paul, Minnesota: Motorbooks International, 1994. ISBN 0-87938-939-7.
- Parker, Dana T. Building Victory: Aircraft Manufacturing in the Los Angeles Area in World War II. Cypress, California: Dana Parker Enterprises, 2013. ISBN 978-0-9897906-0-4.
- 'Pentagon Over the Islands: The Thirty-Year History of Indonesian Military Aviation'. Air Enthusiast Quarterly (2): 154–162. n.d. ISSN 0143-5450.
- Powell, Albrecht. 'Mystery in the Mon'. Archived 31 December 2015 at the Wayback Machine 1994
- Reinhard, Martin A. (January–February 2004). 'Talkback'. Air Enthusiast. No. 109. p. 74. ISSN 0143-5450.
- Scutts, Jerry. B-25 Mitchell at War. London: Ian Allan, 1983. ISBN 0-7110-1219-9.
- Scutts, Jerry. North American B-25 Mitchell. Ramsbury, Marlborough, Wiltshire, UK: Crowood Press, 2001. ISBN 1-86126-394-5.
- Skaarup, Harold A. Canadian Warplanes. Bloomington, Indiana: IUniverse, 2009. ISBN 978-1-4401-6758-4.
- Swanborough, F.G. and Peter M. Bowers. United States Military Aircraft since 1909. London: Putnam, 1963.
- Swanborough, Gordon. North American, An Aircraft Album No. 6. New York: Arco Publishing Company Inc., 1973. ISBN 0-668-03318-5.
- Tallman, Frank. Flying the Old Planes. New York: Doubleday and Company, 1973. ISBN 978-0-385-09157-2.
- Vernon, Jerry (Winter 1993). 'Talkback'. Air Enthusiast. No. 52. pp. 78–79. ISSN 0143-5450.
- Wolf, William. North American B-25 Mitchell, The Ultimate Look: from Drawing Board to Flying Arsenal. Atglen, Pennsylvania: Schiffer Publishing, 2008. ISBN 978-0-7643-2930-2.
- Yenne, Bill. Rockwell: The Heritage of North American. New York: Crescent Books, 1989. ISBN 0-517-67252-9.
Web References on the North American B-25 Mitchell: +
- 13th Bombardment Squadron http://www.3rdattackgroup.org/13th.php
- Wikipedia.org - https://en.wikipedia.org/wiki/North_American_B-25_Mitchell

 Editor for Asisbiz: Matthew Laird Acred
If you love our website please donate so we can make this site even better !!